
Vanilla Custard Cream Squares

Buttery shortcrust topped with a silky vanilla custard and a cloud of fresh whipped cream — easy to make and elegant to serve.

Why You'll Love This Recipe
- Ready with mostly pantry staples: flour, sugar, eggs, butter, and milk — perfect when you want bakery flavor without specialty ingredients.
- Quick to assemble: the dough chills in 30 minutes and the custard cooks in a single saucepan, making this ideal for weekend baking or an afternoon treat.
- Make-ahead friendly: the custard sets in the refrigerator, so you can prepare the base the day before and finish with whipped cream just before serving.
- Textural contrast: a crisp, golden base, satin-smooth custard, and airy whipped cream — a trifecta that keeps every bite interesting.
- Crowd-pleasing format: baked in a 9x9-inch pan and cut into squares, it's easy to portion and transport for gatherings.
- Flexible for decoration: dust with grated vanilla bean, sprinkle chocolate shavings, or top with fruit for seasonal flair.
In my experience, guests always comment on the custard’s silkiness and how it holds its shape when sliced. One time I brought these to a family reunion and the platter disappeared in twenty minutes — the combination of familiarity and a little indulgence seems to win every time. The simplicity also makes it a favorite to teach new bakers; the techniques are foundational and build confidence.
Ingredients
- All-purpose flour (1 1/2 cups): Choose a reliable brand such as King Arthur or Gold Medal for consistent texture; spoon the flour into the cup and level it off to avoid a dense crust.
- Granulated sugar (crust 1/4 cup + custard 1/2 cup): Regular granulated sugar is perfect; it gives structure to the crust and sweetness to the custard without affecting texture.
- Unsalted butter (1/2 cup + 2 tablespoons): Use cold, cubed butter for the crust so you get a flakier texture; the small amount melted into the custard adds silkiness and flavor.
- Salt (1/4 teaspoon crust + 1/4 teaspoon custard): A pinch of fine salt rounds out flavors and brightens the vanilla; use kosher or fine sea salt, not coarse flakes.
- Ice water (1–2 tablespoons): Add sparingly — just enough to bring the dough together so it’s not sticky; chilling the dough keeps the butter intact.
- Whole milk (2 cups): Full-fat milk gives the custard body; you can substitute half-and-half for an even richer texture at the cost of higher fat.
- Cornstarch (1/4 cup): Acts as the thickening agent; whisk it with sugar before adding to eggs to prevent lumps and ensure a glossy finish.
- Egg yolks (4 large): These provide richness and stability to the custard; separate while cold for easier handling and whisk to room temperature briefly before using.
- Vanilla extract (1 tbsp + 1 tsp for topping): Use pure vanilla extract for best aroma; if you have a vanilla bean, scrape the seeds into the custard for an extra-special touch.
- Heavy cream (1 cup) + Powdered sugar (2 tbsp): Heavy cream whipped with a touch of powdered sugar becomes the light, sweet finish that balances the custard’s density.

Instructions
Prepare the crust: Preheat to 350°F. In a food processor, pulse together 1 1/2 cups flour, 1/4 cup sugar and 1/4 teaspoon salt. Add 1/2 cup cold cubed butter and pulse until mixture resembles coarse crumbs; this preserves small butter pockets that bake into flakiness. Add 1–2 tablespoons ice water a teaspoon at a time until dough just holds together. Press into a disc, wrap and chill 30 minutes to relax gluten and firm the butter. Roll and bake: Roll the chilled dough to fit a greased 9x9-inch pan or press it directly into the pan for a rustic finish. Dock lightly with a fork. Bake 15–18 minutes until edges are golden and center is set; allow to cool completely so the hot filling won’t weep into the crust. Warm the milk: Over medium heat, warm 2 cups whole milk until steaming but not boiling (small bubbles at the edge). This tempering step prevents shocking the eggs and helps the custard thicken smoothly. Whisk the thickener: In a bowl whisk 1/2 cup sugar, 1/4 cup cornstarch, and 1/4 teaspoon salt. Add 4 large egg yolks and whisk until smooth and pale; this mixture will give you a lump-free custard when combined with warm milk. Temper and thicken: Gradually stream about one cup of the warm milk into the egg mixture while whisking constantly. Return everything to the saucepan and cook over medium-low, whisking, until the mixture thickens and comes to a gentle boil, about 5–7 minutes. Once thick, cook one minute more to eliminate a starchy taste. Finish the custard: Remove from heat and stir in 2 tablespoons butter and 1 tablespoon vanilla extract until glossy. Pour the custard over the cooled crust and smooth the surface. Cover directly with plastic wrap (to prevent a skin) and refrigerate at least 2 hours until fully set. Make the whipped topping: In a chilled bowl, beat 1 cup heavy cream with 2 tablespoons powdered sugar and 1 teaspoon vanilla until soft peaks form. Be careful not to overbeat; you want the cream to be spreadable, not grainy. Assemble and chill: Once the custard is firm, spread the whipped cream evenly across the top. Chill 30 minutes more to let the topping settle. Slice into 9 or 12 squares with a sharp knife dipped in hot water for clean edges.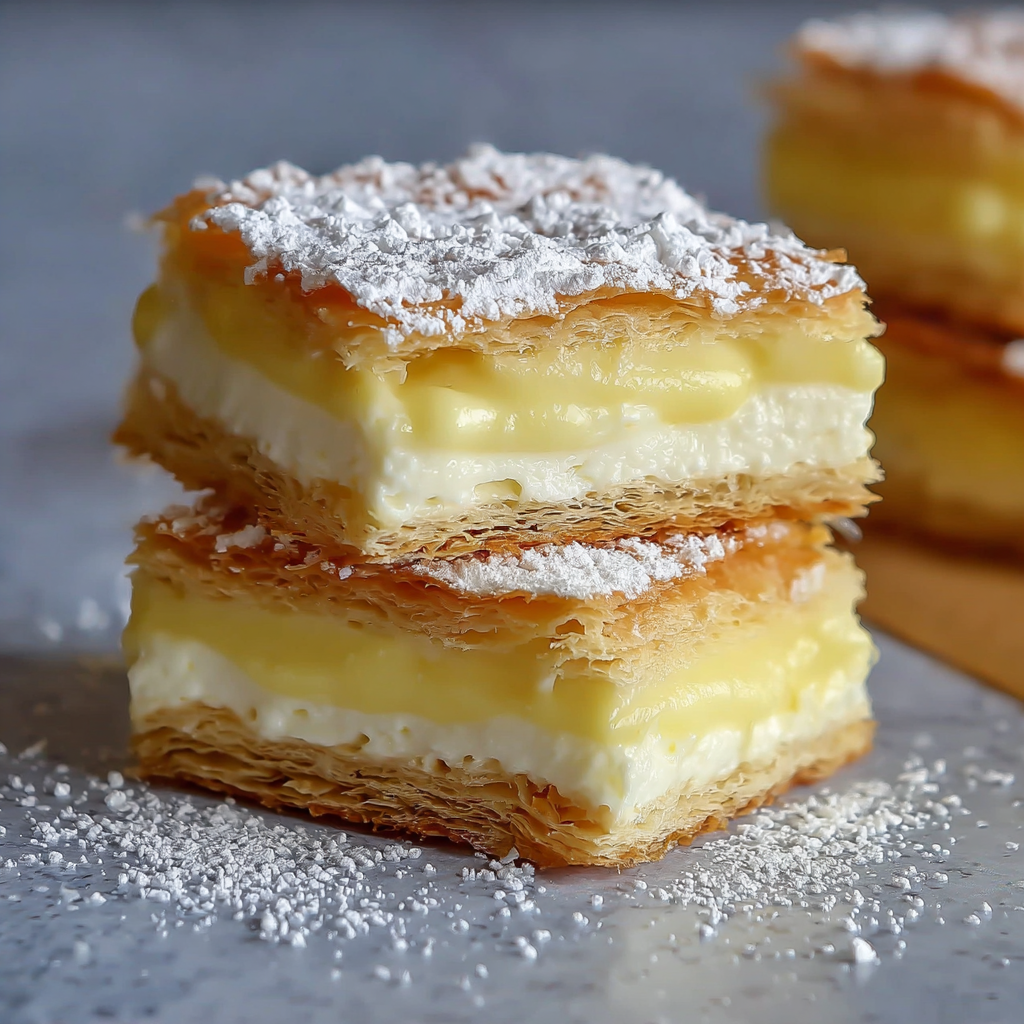
You Must Know
- Custard will firm as it cools — chilling for at least 2 hours (preferably overnight) gives the cleanest slices.
- Store in the refrigerator for up to 3 days in an airtight container; the crust softens slightly but retains flavor.
- This contains dairy, eggs, and gluten — not suitable for those with related allergies unless ingredients are substituted.
- For the creamiest custard, avoid boiling vigorously; a gentle simmer and constant whisking prevents curdling and lumps.
My favorite aspect is how versatile the final squares are: a dusting of grated vanilla bean makes them elegant for guests, while a simple sprinkle of grated chocolate makes them irresistible to kids. I learned early on that chilling both the custard and pan before slicing results in the neatest portions — a trick that saves time when hosting. The whipped cream can be flavored with citrus zest or liqueur for grown-up variations, but plain vanilla lets the custard’s texture shine.
Storage Tips
Store leftovers covered in the refrigerator for up to 3 days. Use an airtight container or tightly wrap the pan with plastic to prevent the whipped topping from drying out. If you need longer storage, freeze uncut squares wrapped individually in plastic and then foil for up to 1 month; thaw in the refrigerator overnight and refresh the top with freshly whipped cream. When reheating, avoid warming the entire square — instead, serve cold or bring to room temperature for 15–20 minutes for best texture.
Ingredient Substitutions
If you prefer a lighter filling, substitute half the whole milk with 2% milk or use half-and-half for a richer result. For a gluten-free base, replace the all-purpose flour with a cup-for-cup gluten-free flour blend and add 1/8 teaspoon xanthan gum for structure. To make it egg-free, use a cornstarch and milk ganache-style filling, though the texture will be slightly different — less velvet, more pudding-like. Use dairy-free butter and coconut cream for a vegan attempt, but note that flavor and mouthfeel will change.
Serving Suggestions
Serve chilled squares with a short, strong coffee or a light dessert wine. For brunch, pair with fresh berries and a sprig of mint for color contrast. For an elegant finish, dust with a pinch of vanilla powder or grated dark chocolate. Cut into smaller bite-sized portions for parties, or present on a slate board with seasonal fruit to elevate the presentation. The neutral vanilla profile allows for many accompaniments: caramel drizzle, poached pears, or citrus curd all complement beautifully.
Cultural Background
Vanilla custard-based desserts trace their roots to classic European pastry traditions where pastry cream (crème pâtissière) is a foundational component. Transforming a silken custard into a traybake is a homey adaptation that borrows the techniques of patisserie — tempering eggs, thickening with starch, and enriching with butter. Across cultures, similar assembled desserts appear in layered tarts and bars, speaking to the universal appeal of creamy fillings atop a baked base. This square format makes the technique accessible to home cooks looking for bakery-style results without advanced equipment.
Seasonal Adaptations
In summer, top the squares with macerated strawberries or a berry compote for bright acidity that cuts through the richness. In autumn, fold a pinch of ground cinnamon or a spoonful of pumpkin purée into the custard for a seasonal twist. For winter holidays, stir in a tablespoon of orange liqueur to the custard and decorate with candied orange peel. Adjusting toppings and garnishes lets the same base fit into every season without changing the core method.
Meal Prep Tips
Plan this as a two-day project: make the crust and custard the first day, chill overnight, and whip the cream just before serving. Portion into single-serve containers for grab-and-go treats or cut squares and layer with parchment between pieces for convenient snacking. Use a shallow pan for faster chilling and an even set; metal pans chill faster than glass. Label and date containers if storing in the freezer, and always thaw in the refrigerator to preserve texture.
These Vanilla Custard Cream Squares are a simple way to bring a bakery-level dessert into your home kitchen without fuss. With a crisp base, velvety filling, and gentle whipped topping, they’re a reliable treat for many occasions — and I hope they become a favorite in your kitchen too.
Pro Tips
Use cold butter for the crust and handle the dough minimally to keep it flaky.
Temper the egg yolks by slowly whisking in warm milk to avoid curdling.
Chill the pan and use a hot-water-dipped knife for clean slices.
This nourishing vanilla custard cream squares recipe is sure to be a staple in your kitchen. Enjoy every moist, high protein slice — it is perfect for breakfast or as a wholesome snack any time.
FAQs about Recipes
How long should the custard set before adding whipped cream?
Chill for at least 2 hours; overnight chilling yields the cleanest slices.
Can I press the crust directly into the pan instead of rolling?
Yes — press dough into the pan without rolling for a quicker method, but chilling helps structure.
Tags
Vanilla Custard Cream Squares
This Vanilla Custard Cream Squares recipe makes perfectly juicy, tender, and flavorful steak every time! Serve with potatoes and a side salad for an unforgettable dinner in under 30 minutes.
Ingredients
Crust
Custard filling
Topping
Instructions
Prepare the crust
Combine flour, sugar, and salt in a food processor. Add cold butter and pulse until coarse crumbs form. Add ice water sparingly until dough just comes together. Chill 30 minutes.
Bake the crust
Press or roll the dough into a greased 9x9-inch pan, dock with a fork, and bake at 350°F for 15–18 minutes until golden. Cool completely.
Warm the milk and mix dry ingredients
Heat milk until steaming. Whisk sugar, cornstarch, and salt in a bowl, then whisk in egg yolks until smooth.
Temper and thicken custard
Slowly whisk warm milk into the egg mixture, return to pan, and cook over medium-low until thickened, about 5–7 minutes. Stir constantly to avoid lumps.
Finish and chill custard
Stir in butter and vanilla until glossy. Pour over cooled crust, cover, and refrigerate at least 2 hours to set.
Prepare whipped topping
Beat heavy cream with powdered sugar and vanilla in a chilled bowl until soft peaks form; spread over set custard.
Slice and serve
Chill 30 minutes more if desired, then slice into squares using a hot, wiped knife for clean edges. Store refrigerated up to 3 days.
Last Step: Please leave a rating and comment letting us know how you liked this recipe! This helps our business to thrive and continue providing free, high-quality recipes for you.
Nutrition
Did You Make This?
Leave a comment & rating below or tag
@snapyrecipe on social media!
Categories:
You might also like...
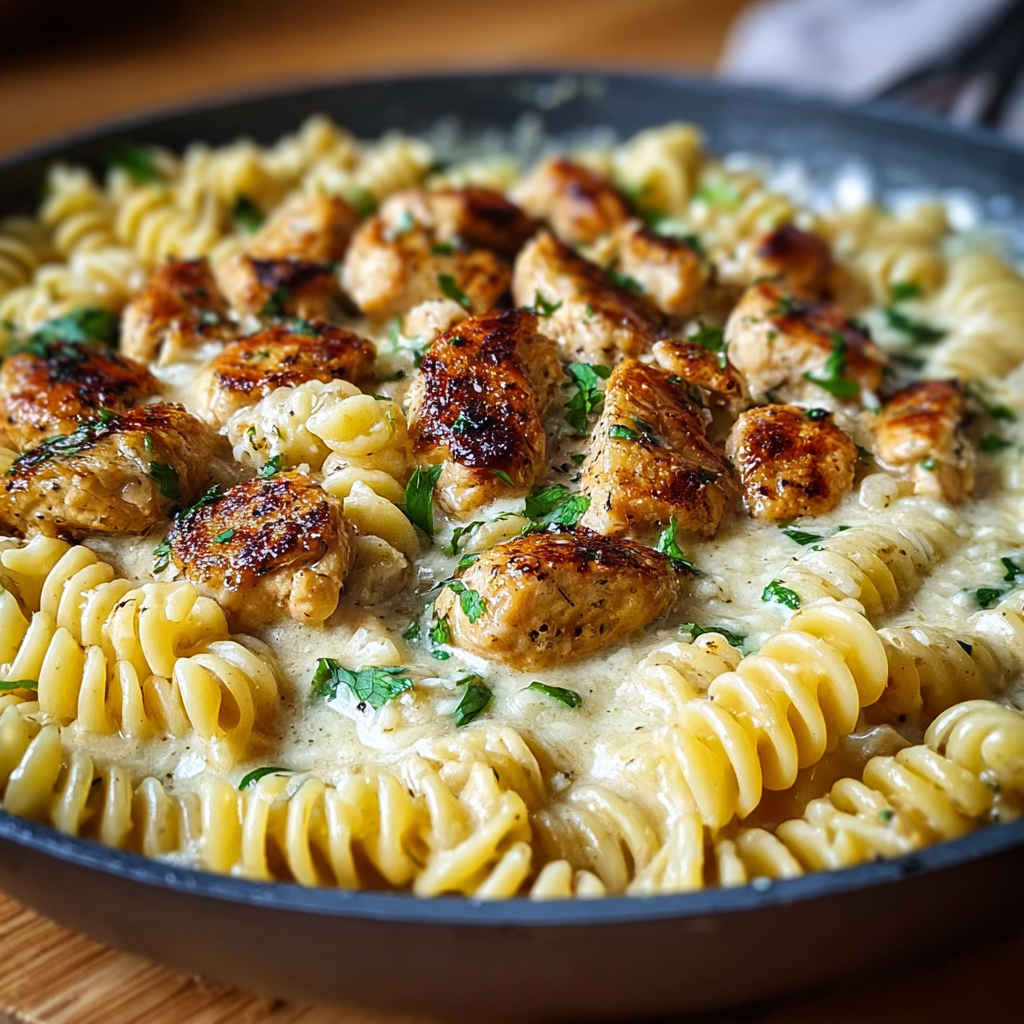
Creamy Garlic Butter Chicken & Rotini in Parmesan Sauce
Golden-browned chicken tossed with rotini in a silky garlic Parmesan sauce—comforting, quick, and perfect for weeknight dinners.
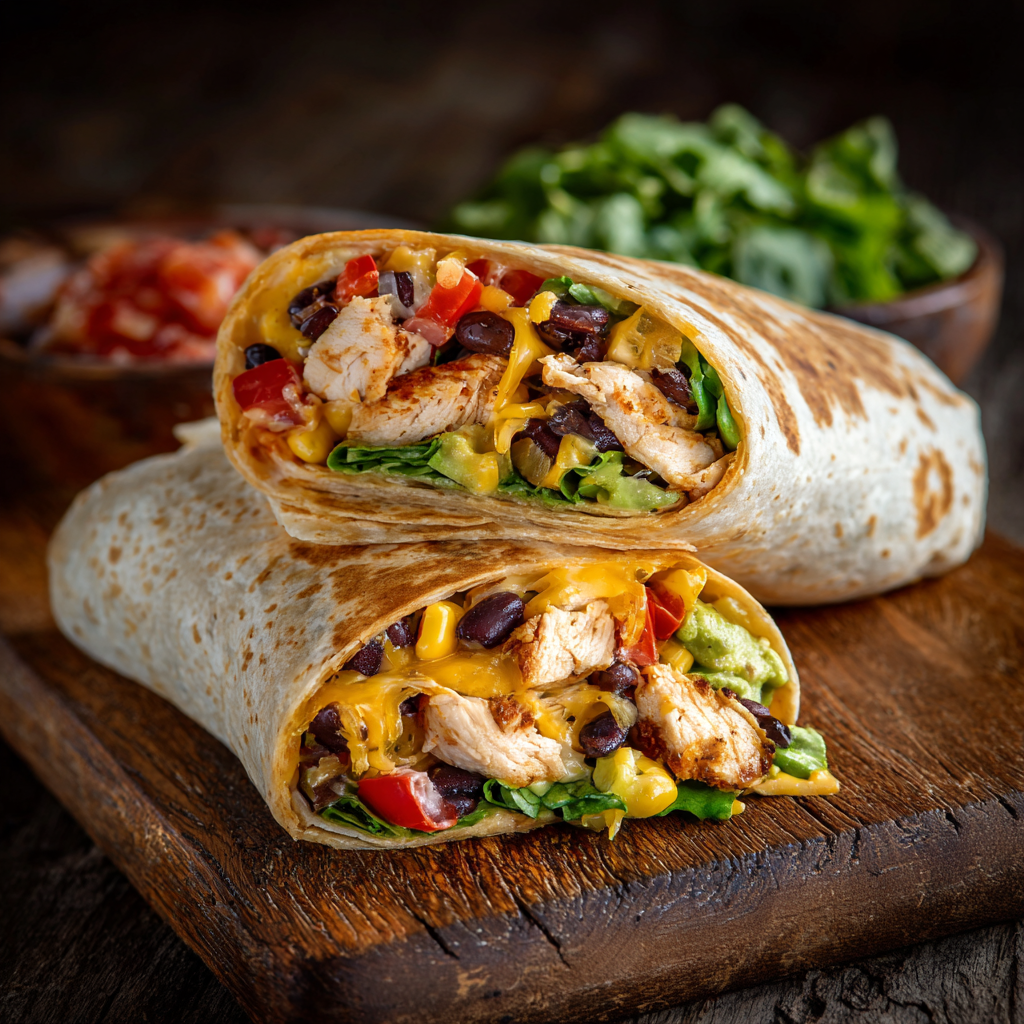
Southwest Chicken Wrap
A vibrant, smoky Southwest chicken wrap loaded with rice, beans, corn, and a creamy chipotle-lime sauce — perfect for lunch, meal prep, or an easy weeknight.

Classic Apple Crumble
A timeless apple crumble with a buttery, cinnamon-scented topping and tart-sweet Granny Smith filling — perfect warm with vanilla ice cream.
Did You Make This?
Leave a comment & rating below or tag @snapyrecipe on social media!
Rate This Recipe
Share This Recipe
Enjoyed this recipe? Share it with friends and family, and don't forget to leave a review!
Comments (1)
This recipe looks amazing! Can't wait to try it.
Comments are stored locally in your browser. Server comments are displayed alongside your local comments.
Hi, I'm Natalia!
What's Popular

Get My 30-Minute Meals email series!
Quick and easy dinner ideas delivered to your inbox.