>>
30-MINUTE MEALS! Get the email series now →


Delicate chocolate heart-shaped sandwich cookies filled with a creamy vanilla buttercream — perfect for sharing on Valentine’s Day or any special occasion.

This chocolate heart-shaped sandwich cookie was born from a flour-dusted afternoon when I wanted something pretty, portable, and utterly comforting to share on Valentine’s Day. I discovered this combination of a tender cocoa cookie and a pillowy vanilla buttercream while experimenting with a classic shortbread base and a favorite buttercream formula. The result is crisp-edged cookies that yield to a soft interior and a sweet filling that balances cocoa notes rather than competing with them. Every year these little sandwiches become the edible love notes I tuck into lunch boxes and gift boxes, and they always get asked about by friends and neighbors.
What makes these particularly special is the texture contrast: the cookies bake to a delicate crunch around the rim while staying slightly tender in the center, and the filling is smooth enough to pipe but stable enough to hold up at room temperature for a few hours. I prefer using high-quality Dutch-process cocoa and unsalted butter for control over salt. The recipe is forgiving enough for home bakers and impressive enough to give as a homemade gift — small, festive, and reliably crowd-pleasing.
I first made these on a chilly February weekend while listening to old vinyl and testing cocoa ratios. My partner declared them the best thing I had baked that month, and neighbors who received a small tin asked for the recipe. Over the years I learned to chill the dough just long enough to roll smoothly, and to use low-speed mixing during the final combine so the crumb stays tender rather than dense.

My favorite part is packing a small tin of these to give as a neighbourly gesture. On one occasion a friend carried a tin across town on a warm day and reported back that the cookies arrived intact and people were delighted. These sandwiches have a way of turning ordinary afternoons into little celebrations and they teach patience in the kitchen — that hour of chill time is always rewarded.
Store assembled sandwiches in a single layer or separated by parchment in an airtight container at room temperature for up to 24 hours. For longer storage refrigerate and allow to come to room temperature before serving to soften the buttercream. Unfilled cookies freeze best laid flat on a baking sheet until firm, then transferred to a freezer bag for up to 3 months. Thaw frozen cookies at room temperature before filling to avoid condensation on the surface.

If you need an egg-free version, replace the large egg with 1/4 cup unsweetened applesauce — the cookies will be slightly softer. For a dairy-free option, substitute plant-based butter and plant milk for the half and half; be sure to use a block-style plant butter for best texture. Swap Dutch-process cocoa with natural cocoa for a brighter chocolate flavor but reduce baking powder by 1/2 teaspoon if you notice extra lift. Use a 1-to-1 gluten-free flour blend if necessary; results vary by blend but chilling helps maintain structure.
Serve these as elegant tea-time bites alongside black tea or espresso. For a romantic presentation, arrange on a small tiered tray with edible rose petals or dust a few with sifted powdered sugar. They make lovely additions to cookie boxes, place settings for a dinner party, or paired with a scoop of vanilla ice cream for a grown-up dessert. Garnish with a few sprinkles on the filling or stamp initials into the buttercream for personalized treats.
Chocolate sandwich cookies are a classic form across many baking traditions, inspired by European tea cookies and shortbread techniques. The idea of two cookies joined by a cream or jam dates back centuries and appears in regional variations worldwide. This version blends American butter-rich dough with Dutch-process cocoa, creating a deeper chocolate character reminiscent of cocoa-heavy European bakes while keeping the simplicity of an American home recipe.
For winter, add a pinch of ground cinnamon or a teaspoon of instant espresso to the dough to deepen the flavor. For spring or summer, lighten the filling with a splash of citrus zest or swap vanilla for almond extract and add a smear of raspberry jam for a bright contrast. For holidays, tint the filling with gel color or press a small edible decoration into the center for theme-friendly treats.
Make the dough ahead and freeze discs wrapped tightly; thaw overnight in the refrigerator before rolling. You can also bake all cookies in one day, freeze them unfrosted, and make the buttercream on the day you plan to serve. Assemble just before gifting for the freshest appearance. Use disposable piping bags or zip-top bags with a corner snipped for fast, even filling distribution during assembly.
These chocolate sandwich cookies are simple to master and endlessly adaptable. Whether you’re baking for Valentine’s Day or just because, they deliver consistent charm and flavor — give them a try and make the recipe your own.
Chill the dough for at least 60 minutes for clean shapes and minimal spread.
If the filling is too stiff, add milk or half and half one teaspoon at a time until pipeable.
Roll dough between sheets of parchment to avoid extra flour and to get even thickness.
Bake one test sheet first to verify time in your oven; adjust by 1 minute increments.
Store unfilled cookies in the freezer to assemble later for best freshness when gifting.
This nourishing valentine sandwich cookies recipe is sure to be a staple in your kitchen. Enjoy every moist, high protein slice — it is perfect for breakfast or as a wholesome snack any time.
This Valentine Sandwich Cookies recipe makes perfectly juicy, tender, and flavorful steak every time! Serve with potatoes and a side salad for an unforgettable dinner in under 30 minutes.
Beat 1 cup softened butter with 1 cup granulated sugar on medium speed for 2 to 3 minutes until pale and airy.
Mix in 1 large egg and 1 teaspoon vanilla just until incorporated to avoid overworking the batter.
Whisk 2 cups all-purpose flour, 3/4 cup Dutch-process cocoa, 1 1/2 teaspoons baking powder, and 1 teaspoon salt to remove lumps.
Gradually add dry ingredients to the creamed mixture on low speed and mix until just combined.
Divide dough into two discs, wrap, and refrigerate for about 60 minutes to firm up for rolling.
Preheat oven to 350°F. Roll dough to 1/8 to 1/4 inch thickness and cut with a heart-shaped cutter.
Bake on parchment-lined sheets for 9 to 10 minutes until edges are set. Allow to cool completely on a wire rack.
Beat 1/2 cup softened butter with 2 to 3 tablespoons half and half, 2 teaspoons vanilla, 1/8 teaspoon salt, then add 3 cups powdered sugar until smooth.
Pipe filling onto half of the cooled cookies and sandwich with match shapes, pressing gently to the edges.
Last Step: Please leave a rating and comment letting us know how you liked this recipe! This helps our business to thrive and continue providing free, high-quality recipes for you.
Leave a comment & rating below or tag
@snapyrecipe on social media!
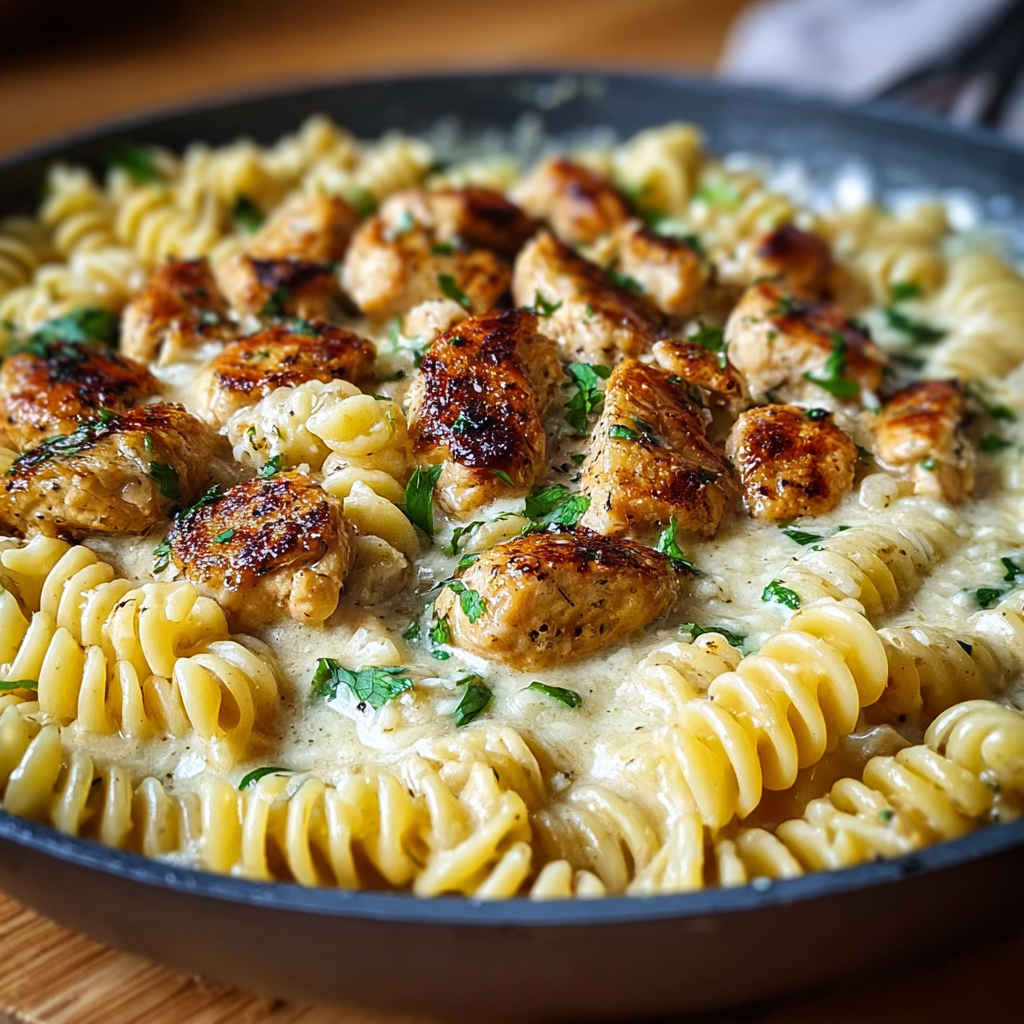
Golden-browned chicken tossed with rotini in a silky garlic Parmesan sauce—comforting, quick, and perfect for weeknight dinners.
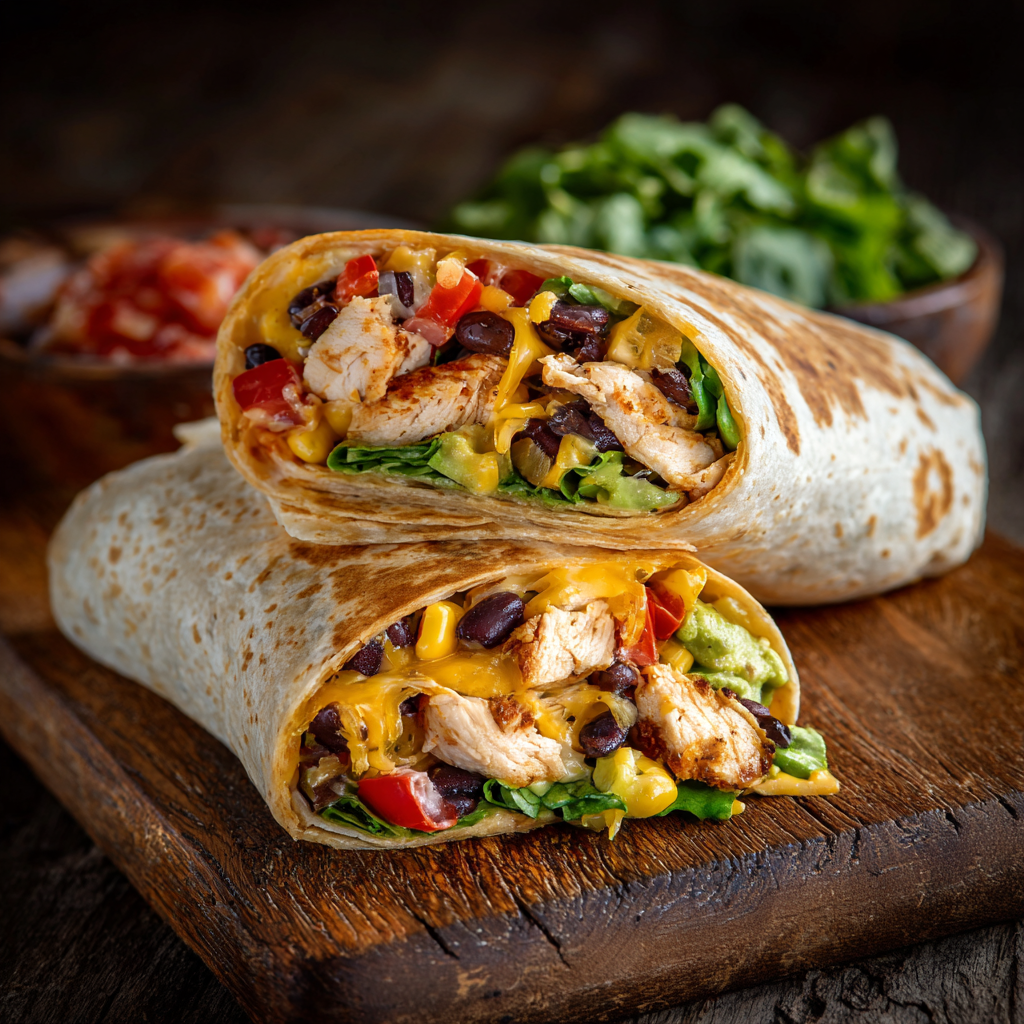
A vibrant, smoky Southwest chicken wrap loaded with rice, beans, corn, and a creamy chipotle-lime sauce — perfect for lunch, meal prep, or an easy weeknight.

A timeless apple crumble with a buttery, cinnamon-scented topping and tart-sweet Granny Smith filling — perfect warm with vanilla ice cream.
Leave a comment & rating below or tag @snapyrecipe on social media!
Enjoyed this recipe? Share it with friends and family, and don't forget to leave a review!
This recipe looks amazing! Can't wait to try it.
Comments are stored locally in your browser. Server comments are displayed alongside your local comments.
Quick and easy dinner ideas delivered to your inbox.