>>
30-MINUTE MEALS! Get the email series now →


A show-stopping three-layer red velvet cake built around a creamy cheesecake center, finished with silken cream cheese frosting, red berry glaze, and chocolate accents.

This Red Velvet Cheesecake Layer Cake has been my celebration centerpiece for years. I first combined a rich red velvet crumb with a silky baked cheesecake during a birthday weekend when I wanted the best of two classic desserts: the tender, cocoa-scented cake and the lush, tangy cream cheese filling. That first attempt filled the house with cocoa and vanilla aromas, and when I cut into it the cheesecake ribbon gleamed between the bright red layers—everyone demanded a second slice. It’s a dessert that feels festive, decadent, and just a little nostalgic.
What makes this version special is the contrast of textures. The red velvet layers are tender and slightly moist from buttermilk and oil; the baked cheesecake layer adds a dense, luscious center that slices cleanly when chilled; the cream cheese frosting ties it together with tang and sweetness. The optional chocolate cookie crust at the base adds an extra chocolate crunch that balances the cake’s sweetness and looks beautiful when visible in a slice. I discovered balance in this cake: chocolate, cream cheese, and cocoa all working together to create a dessert that’s visually dramatic and reliably crowd-pleasing.
I remember serving this at a spring dinner party and watching guests pause mid-conversation when the first slice was cut—there was a collective hush, then instant praise. My sister insisted on the chocolate-crust version and later requested it for every family gathering; it’s become our go-to celebration dessert because it looks impressive but is surprisingly straightforward when you follow the order of steps and allow proper chilling times.
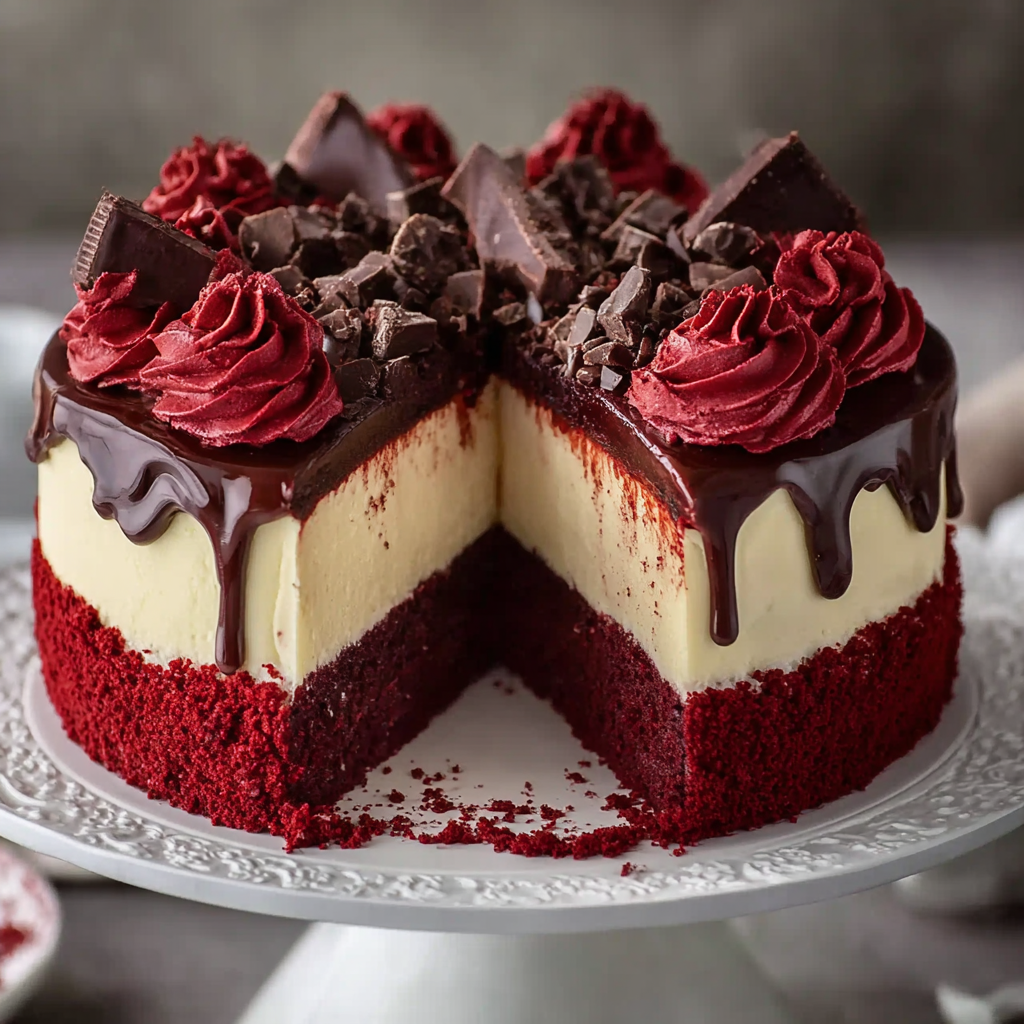
My favorite part is watching the contrast when the first slice is cut—the bright red layers against the creamy white cheesecake always feel celebratory. Family members note the balance: not too sweet thanks to the tang of cream cheese and the faint bitterness from cocoa. It’s a dessert that invites conversation and second helpings, and I often adjust the glaze level to match the season—brighter berry glaze in summer, a darker ganache in winter.
Keep the assembled cake refrigerated in an airtight cake keeper or covered with a dome to prevent it from absorbing other fridge odors. For best texture, store at 36–40°F and consume within 4–5 days. To freeze, cut into individual slices, wrap each tightly in plastic wrap and foil, and freeze up to 2 months. Thaw overnight in the refrigerator before serving. When reheating a single slice, let it reach room temperature for 30 minutes—do not microwave for long, which can change the frosting texture; instead, a 10–15 second burst if needed will slightly soften the frosting for eating.
If you don’t have buttermilk, use 1 1/2 cups milk with 1 tablespoon white vinegar and let sit 5 minutes. For a lighter cheesecake layer, replace half the sour cream with heavy cream. If you avoid dairy, this is not easily adaptable without changing texture; vegan versions require specialty cream cheeses and will behave differently in the oven. Use gluten-free 1:1 flour blend in place of all-purpose and increase baking powder slightly if needed. For the cookie crust, graham cracker crumbs can replace chocolate cookies for a milder base.
Serve slices chilled with a dollop of lightly sweetened whipped cream or a few fresh raspberries to echo the berry glaze. For a party, plate a slice with a smear of extra berry sauce and a sprinkle of chopped toasted pecans for texture. This dessert pairs beautifully with black coffee, espresso, or a glass of late-harvest dessert wine. For a brunch twist, make smaller individual portions in 6-inch pans for elegant single servings.
Red velvet cake has roots in early 20th-century North American baking; the striking red hue became associated with Southern hospitality and celebratory occasions. The combination with a baked cheesecake layer is a modern innovation marrying two classic American desserts into one impressive centerpiece. This hybrid plays on contrasts—cocoa-marked cake with tangy cream cheese—highlighting how American baking often blends regional favorites to create new traditions.
In summer, substitute the berry glaze with a fresh raspberry coulis and top with fresh berries for brightness. In fall or winter, switch the glaze to a dark chocolate ganache and scatter toasted hazelnuts for warmth. For Valentine’s Day, add a raspberry mirror glaze and use heart-shaped piping. Adjust the cinnamon or spice content in the cake batter for a cozy seasonal flavor if desired, but keep cocoa light to maintain the classic red velvet profile.
Bake cake layers and cheesecake up to two days ahead—wrap layers tightly and refrigerate. Store frosting in the fridge in an airtight container and let it soften at room temperature before using. Level and crumb-coat the cake the day before; the final smooth coat and glaze can be done the day of serving for best appearance. When transporting, use a flat cake carrier and keep cool with ice packs to prevent sliding or frosting damage.
This cake is the kind of project that rewards planning: make the crust and cheesecake one day, cake layers another, and assemble and decorate on the event day for a stress-free celebration. I hope you enjoy making it as much as we enjoy eating it.
Always use room-temperature cream cheese and butter for smooth batters and frosting—this prevents lumps.
Press the cookie crust firmly and bake briefly to avoid a soggy base under the cheesecake.
Allow the cheesecake to cool gradually at room temperature before chilling to reduce the chance of cracks.
Use gel food coloring for more vibrant red without adding excess liquid.
This nourishing red velvet cheesecake layer cake recipe is sure to be a staple in your kitchen. Enjoy every moist, high protein slice — it is perfect for breakfast or as a wholesome snack any time.
Chill the cheesecake at least 4 hours or overnight to ensure firm slicing and prevent sliding when assembling the layers.
Yes—wrap individual slices tightly in plastic and foil and freeze up to 2 months. Thaw in the refrigerator overnight.
This Red Velvet Cheesecake Layer Cake recipe makes perfectly juicy, tender, and flavorful steak every time! Serve with potatoes and a side salad for an unforgettable dinner in under 30 minutes.
Combine 2 cups cookie crumbs with 1/2 cup melted butter, press into a 9-inch springform pan, and bake at 350°F for 10 minutes. Cool completely before adding cheesecake batter.
Whisk dry ingredients; blend wet ingredients including 1–2 tbsp red gel. Fold together until just combined, divide into two greased 9-inch pans, and bake at 350°F for 25–30 minutes. Cool completely.
Beat 16 oz cream cheese with 1/2 cup sugar until smooth, add eggs one at a time, mix in 1/2 cup sour cream and 1 tsp vanilla. Pour over cooled crust and bake at 325°F for 40–45 minutes until set at the edges and slightly jiggly in the center. Cool and chill for at least 4 hours.
Beat 16 oz cream cheese with 1 cup butter until smooth, gradually add 4 cups powdered sugar, then 2 tsp vanilla. Chill briefly if too soft and beat again before using.
Place one red velvet layer on the serving plate, spread a thin layer of frosting, add chilled cheesecake, then the second cake layer. Crumb-coat, chill, and finish with a smooth layer of frosting.
Warm 1/2 cup jam with 2 tbsp water and 1 tsp lemon juice until pourable, cool slightly, and pour over the cake. Pipe extra frosting, add cake crumbs and chocolate chips, then chill before serving.
Last Step: Please leave a rating and comment letting us know how you liked this recipe! This helps our business to thrive and continue providing free, high-quality recipes for you.
Leave a comment & rating below or tag
@snapyrecipe on social media!
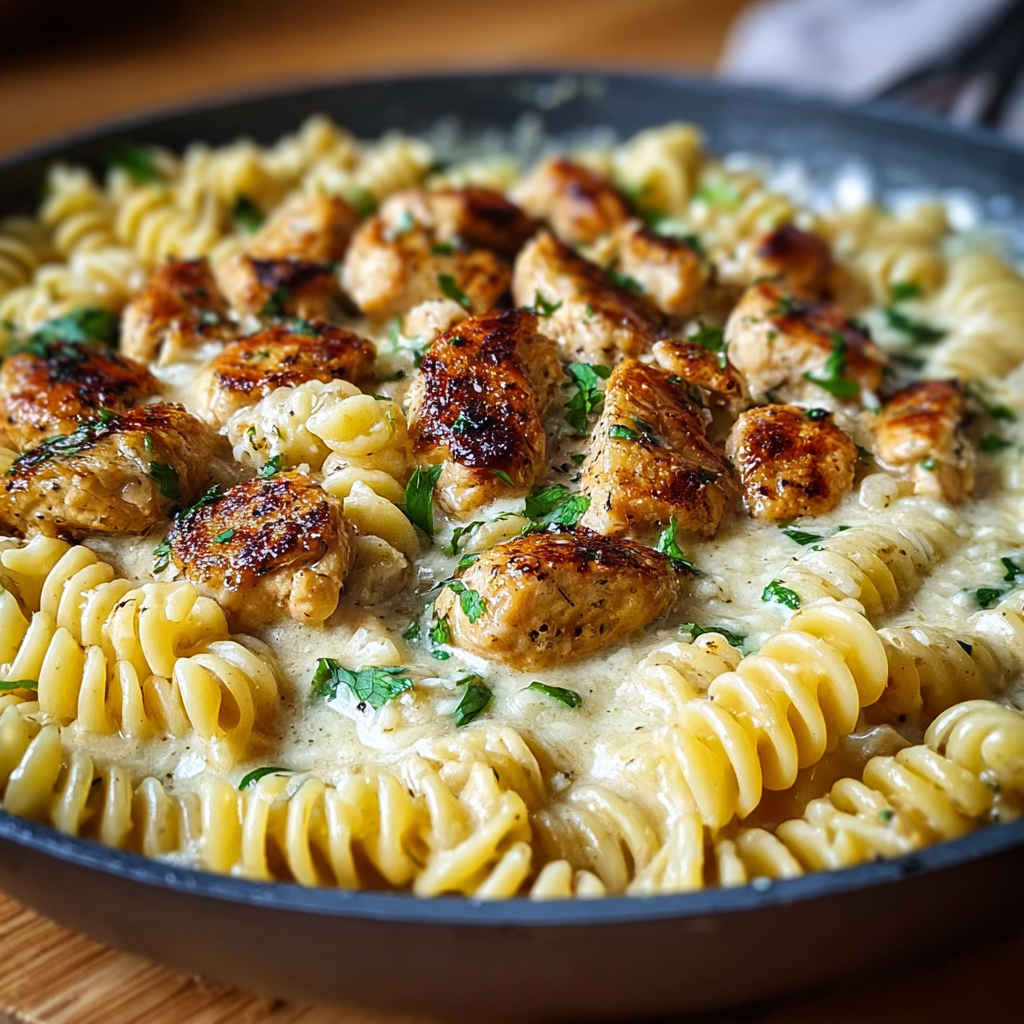
Golden-browned chicken tossed with rotini in a silky garlic Parmesan sauce—comforting, quick, and perfect for weeknight dinners.
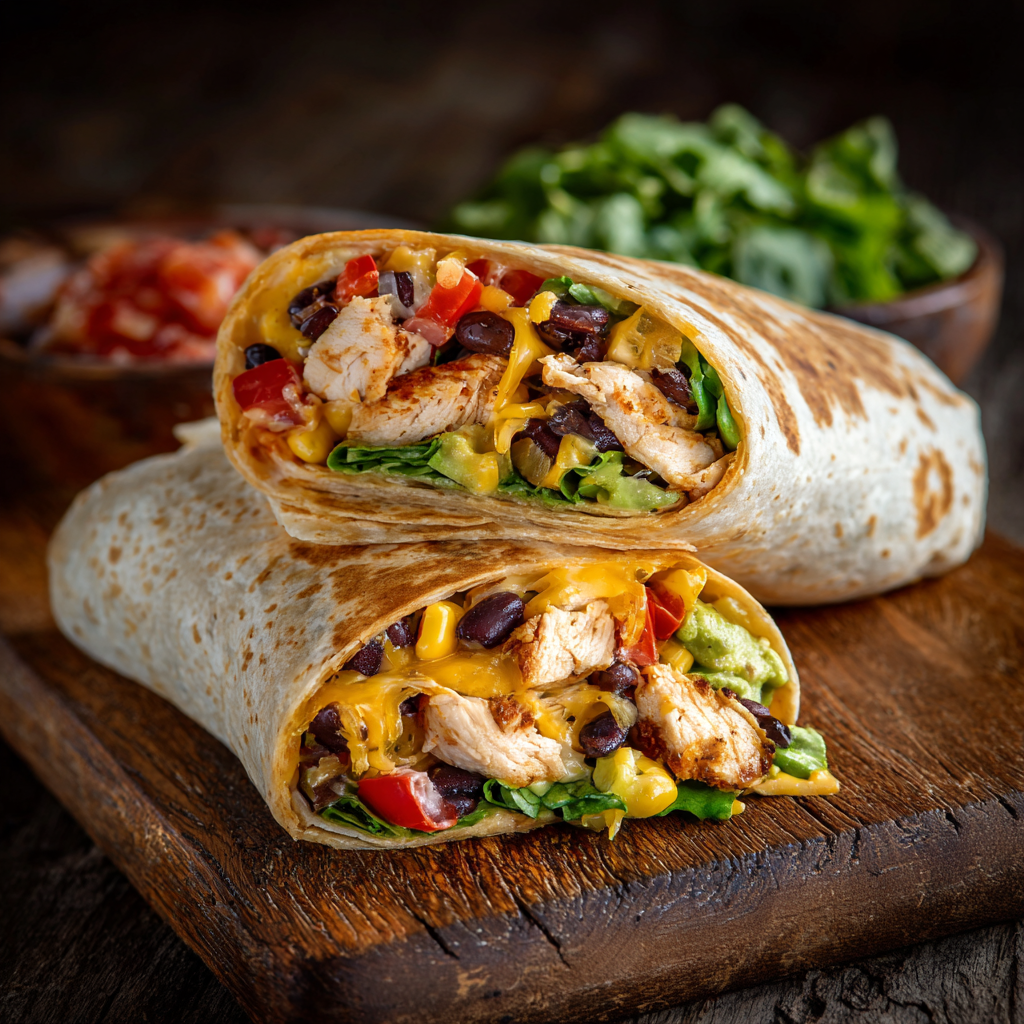
A vibrant, smoky Southwest chicken wrap loaded with rice, beans, corn, and a creamy chipotle-lime sauce — perfect for lunch, meal prep, or an easy weeknight.

A timeless apple crumble with a buttery, cinnamon-scented topping and tart-sweet Granny Smith filling — perfect warm with vanilla ice cream.
Leave a comment & rating below or tag @snapyrecipe on social media!
Enjoyed this recipe? Share it with friends and family, and don't forget to leave a review!
This recipe looks amazing! Can't wait to try it.
Comments are stored locally in your browser. Server comments are displayed alongside your local comments.
Quick and easy dinner ideas delivered to your inbox.