
Little Debbie Christmas Tree Cake Truffles (Easy No-Bake Recipe)

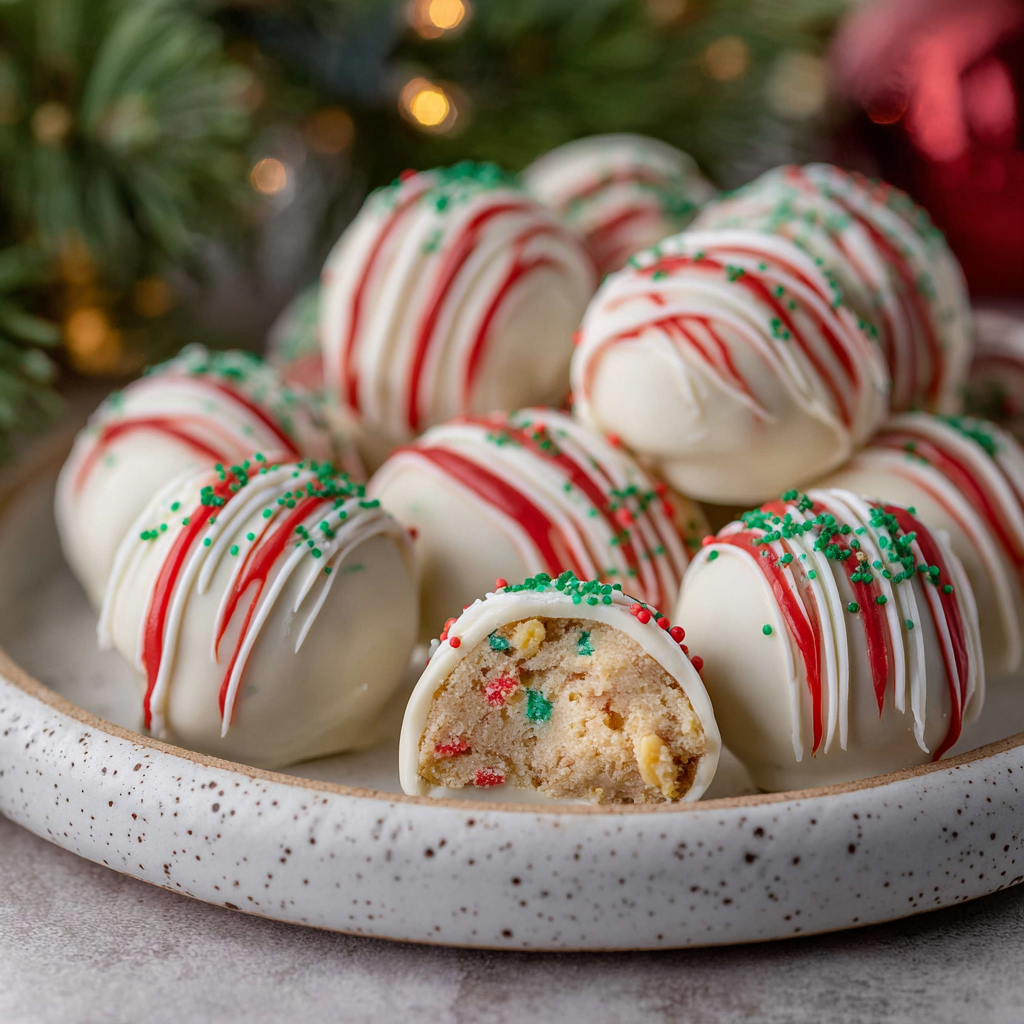
Turn Little Debbie Christmas Tree Cakes into festive no-bake truffles coated in white chocolate, drizzled with red and finished with green sanding sugar — ready in minutes and perfect for holiday gatherings.

This festive bite-size treat started as a quick solution for a last-minute class party and became a holiday staple in my kitchen. I discovered the idea when I had a partial box of Little Debbie Christmas Tree Cakes left over after decorating—rather than let them sit stale, I crumbled them and experimented with candy melts and sprinkles. The result is a sweet, tender center that tastes exactly like the original cake but pops with extra texture from the coating and sanding sugar. The white chocolate coating gives a creamy snap while the inside remains moist and slightly cake-like, making these truffles irresistible at any holiday gathering.
What I love most is how effortless they are: no oven, no complicated tempering (unless you want glossy chocolate), and they are wonderfully forgiving. Kids love helping to roll the balls, and grown-ups love how quickly a mundane box of store-bought treats transforms into something homemade and special. These truffles store well in the fridge and travel beautifully, which is why I always bring a tin to holiday potlucks and family movie nights.
Why You'll Love This Recipe
- Extremely quick and easy: start to finish in about 30 minutes depending on chilling time — perfect when you're short on prep time during busy holidays.
- No baking required: transform pre-made cakes into elegant confections without turning on your oven, ideal for apartments or warm kitchens.
- Kid-friendly activity: children can help unwrap, roll, and decorate, making these a fun family project that sparks holiday excitement.
- Uses pantry and seasonal staples: you only need a box of the cakes, candy melts or white chocolate, and a few decorations you likely already have.
- Make-ahead friendly: set them in the fridge or freezer, then pull out for quick dessert platters or edible gifts — they hold up well for several days refrigerated.
- Highly customizable: swap coatings, add extracts, or mix in nuts or cocoa powder to suit your holiday theme or dietary needs.
I first made these for a school cookie swap and learned that texture balance is everything: the cake center should be moist but firm enough to roll, and the coating must be fully set before stacking. Every time I bring a tin to family gatherings it disappears first — people tell me the coating brings a grown-up finish to a simple childhood favorite.
Ingredients
- Little Debbie Christmas Tree Cakes: Use one standard 5-cake box (about 5 individual cakes). Look for the fresh-packaged snack cakes in the grocery snack aisle; they provide the sweet, spongy interior that becomes the base of the truffle.
- White chocolate or candy melts (8 ounces): Choose high-quality white chocolate chips (e.g., Ghirardelli) or candy melts (e.g., Wilton) for smooth melting and sturdy coating. Candy melts are easier to use but white chocolate has deeper flavor when properly tempered.
- Festive sprinkles (3 tablespoons): Small star or nonpareil sprinkles add color and texture; stir them into the crumb for pleasant flecks in each truffle.
- Red candy melts (3 tablespoons, optional): For a bright decorative drizzle. Melt in a small bag for controlled piping.
- Green sanding sugar: A few teaspoons for finishing — gives sparkle and a crisp bite that contrasts nicely with the soft center.
- Equipment and extras: Parchment paper, baking sheet, microwave-safe bowl or double boiler, mixing bowl, handheld mixer (or a fork), tablespoon or small cookie scoop, and a zip-top or piping bag for drizzling.
Instructions
Unwrap and crumble the cakes: Remove all wrappers from the Little Debbie Christmas Tree Cakes and place the cakes in a large mixing bowl. Break them up slightly with your hands so the mixer has an easier job — this reduces dust and keeps the texture consistent. If you don’t have a mixer, smash them with a sturdy spatula until uniformly crumbly. Form the crumb mixture: Use a handheld mixer on low to medium speed to process the cake pieces into fine crumbs. Stop and scrape the bowl once to ensure even texture. Sprinkle in the festive sprinkles and pulse a few times so they are evenly distributed without disintegrating. The mixture should cling together when pressed; if it feels too dry, add 1 teaspoon of milk at a time until it holds. Scoop and roll: Use a tablespoon or small cookie scoop to portion the mixture and roll each portion between your palms into a uniform ball. Place balls on a parchment-lined baking sheet about 1 inch apart. For even truffles, aim for 1-inch to 1 1/4-inch diameter balls. Chill in the refrigerator for 10–15 minutes so they firm up and are easier to dip. Melt the white coating: Place the white chocolate or candy melts in a microwave-safe bowl and heat in 20–30 second bursts at 50% power, stirring in between until smooth. Alternatively, use a double boiler over barely simmering water and stir until melted. Avoid overheating; the coating should be glossy and fluid for easy dipping. Dip the truffles: Using a fork or dipping tool, lower one chilled truffle into the melted coating and lift, tapping the fork on the bowl to let excess drip off. Return the coated truffle to the parchment. If needed, use a toothpick to reposition before the coating sets. Work quickly — keep the coating warm and reheat briefly if it begins to thicken. Drizzle and decorate: Melt the red candy melts in a small bowl or piping bag using 15–20 second bursts in the microwave, massaging the bag between bursts to distribute heat. Snip a tiny corner of the bag and drizzle across the set white coating. While the drizzle is still wet, sprinkle green sanding sugar on top to create a festive contrast. Chill briefly to set the decorations. Set and store: Allow the truffles to set in the refrigerator for at least 10 minutes before transferring to an airtight container. Layer parchment between the layers if stacking. Serve chilled or at cool room temperature for the best texture.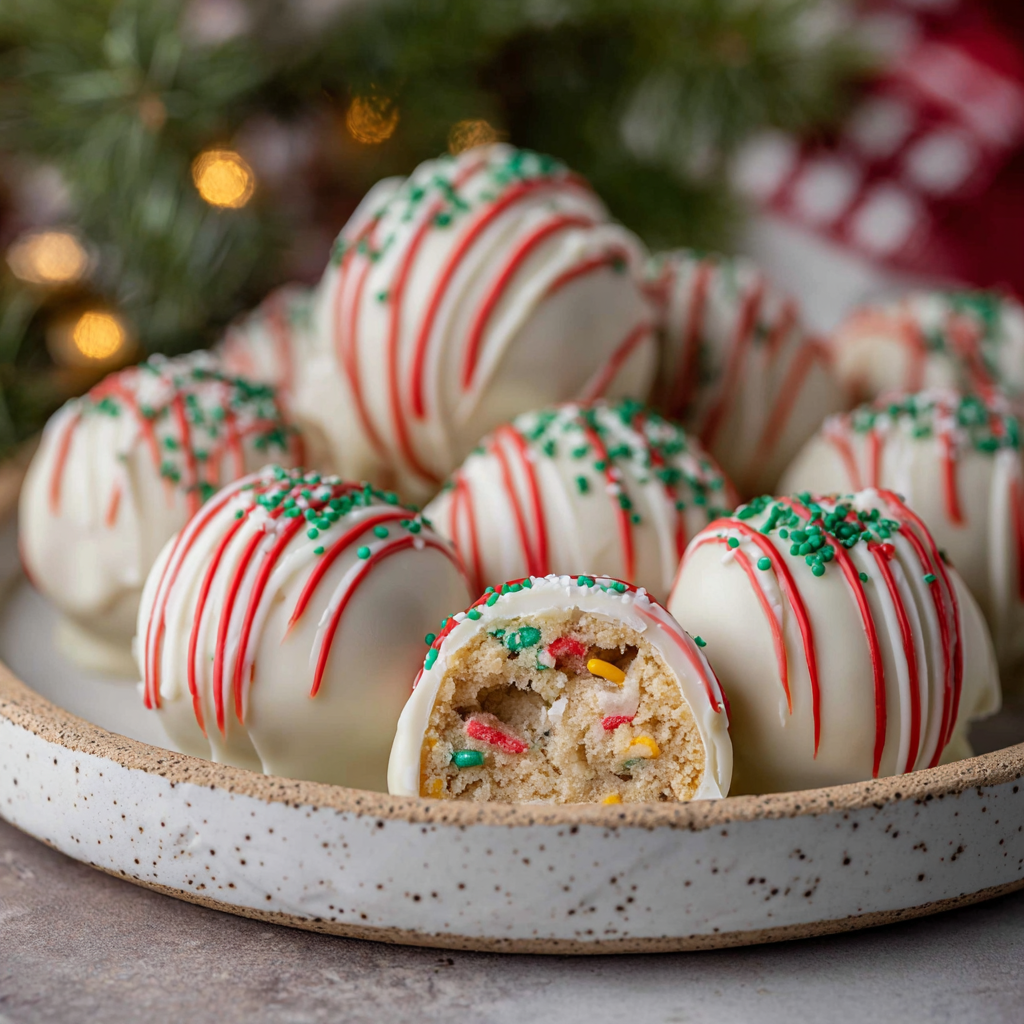
You Must Know
- These treats are essentially no-bake, relying on pre-made cakes and melted coating; they are quick to assemble and chill rather than cook.
- Store them refrigerated for up to 7 days or freeze for longer storage — they freeze well for up to 3 months in a single layer wrapped tightly.
- Allergens include wheat and dairy when using classic white chocolate; choose allergy-friendly alternatives if needed.
- Texture balance is key: chill the rolled centers before dipping to prevent them from falling apart in the coating.
My favorite part of making these is the reaction at parties — people are surprised when I tell them the centers are store-bought cakes because the chocolate coating and sanding sugar make them look homemade and elegant. Over the years I’ve learned to always make a double batch; they disappear fast and are perfect little edible gifts tucked into small boxes tied with ribbon.
Storage Tips
Keep truffles in an airtight container in the refrigerator for up to 7 days; for best texture, remove them 10–15 minutes before serving so the coating softens slightly. To freeze, place truffles on a tray until firm, then transfer to a freezer-safe container with parchment layers between rows to prevent sticking. Thaw overnight in the refrigerator. Avoid storing at room temperature for extended periods if your kitchen is warm—white chocolate coatings can soften and sweat.
Ingredient Substitutions
If you prefer a richer coating, swap candy melts for good-quality white chocolate chips, but temper them if you want a glossy finish. For a chocolate variation, use milk or dark candy melts. To make the center less sweet, stir in 1–2 tablespoons of unsweetened cocoa powder or crushed nuts to add depth and balance. For dairy-free and gluten-free options, seek plant-based white coatings and certified gluten-free snack cakes or use crushed gluten-free sandwich cookies as the base.
Serving Suggestions
Arrange truffles on a festive platter with holly sprigs or rosemary sprigs for a seasonal garnish. Pair them with hot cocoa, coffee, or a lightly spiced mulled cider. For dessert plates, add a few fresh berries and mint leaves to contrast sweetness with a bright note. They also make excellent edible gifts — place 6–8 truffles in a small box with tissue paper and a holiday tag.
Cultural Background
Turning packaged cakes into truffles follows a long tradition of transforming simple baked goods into bite-sized confections, similar to cake pops and brigadeiros. This approach is popular for holidays worldwide: using familiar store-bought treats as a base lets home cooks create visually impressive sweets without advanced techniques. The Little Debbie Christmas Tree Cake is an American seasonal snack cake, and these truffles riff on that nostalgia while elevating presentation for holiday entertaining.
Seasonal Adaptations
Switch the sprinkles and sanding sugar colors to match other holidays: pastel sugars for spring gatherings, orange and black for Halloween, or red and pink for Valentine’s Day. Add a teaspoon of peppermint extract to the crumb mixture for a minty twist, or stir in finely chopped toasted nuts for Thanksgiving. You can also dye the white coating with oil-based food colors for brighter hues without affecting texture.
Meal Prep Tips
Prepare the crumb centers up to 24 hours in advance and store them chilled in an airtight container to make final assembly quicker on the day of serving. Melt coatings just before dipping and keep them warm on the lowest setting or in short microwave bursts while you work. Use a small cooler with ice packs for transporting to parties so the coating doesn’t soften during travel.
These truffles capture the comfort of a childhood snack and the polish of a homemade confection — they invite improvisation and always make holiday moments a little sweeter. Try your favorite variations and enjoy sharing them with friends and family.
Pro Tips
Chill the rolled centers for 10–15 minutes before dipping to prevent them from falling apart in the coating.
Heat candy melts gently in short bursts and stir thoroughly to avoid overheating and seizing.
If the crumb mixture is too dry, add milk 1 teaspoon at a time until it holds together when pressed.
Work on a parchment-lined tray and chill in batches to keep the centers firm while you dip.
This nourishing little debbie christmas tree cake truffles (easy no-bake recipe) recipe is sure to be a staple in your kitchen. Enjoy every moist, high protein slice — it is perfect for breakfast or as a wholesome snack any time.
FAQs about Recipes
How long do these truffles keep?
Yes. Store in an airtight container in the refrigerator for up to 7 days. For longer storage, freeze up to 3 months and thaw overnight in the refrigerator.
What's the best way to melt the coating?
Use a microwave in 20–30 second bursts at 50% power, stirring between bursts. Alternatively, use a double boiler over simmering water for smoother, more controlled melting.
Tags
Little Debbie Christmas Tree Cake Truffles (Easy No-Bake Recipe)
This Little Debbie Christmas Tree Cake Truffles (Easy No-Bake Recipe) recipe makes perfectly juicy, tender, and flavorful steak every time! Serve with potatoes and a side salad for an unforgettable dinner in under 30 minutes.
Ingredients
Main
Instructions
Unwrap and prepare
Remove wrappers and place all 5 Little Debbie Christmas Tree Cakes into a large mixing bowl. Break them up slightly by hand to make them easier to process.
Crumble and mix
Using a handheld mixer on low, process the cakes until fine crumbs form. Stir in 3 tablespoons of festive sprinkles. If mixture is too dry, add milk 1 teaspoon at a time until it holds together when pressed.
Portion and chill
Scoop the mixture by tablespoon or use a small cookie scoop. Roll into 1- to 1 1/4-inch balls between your palms and place on a parchment-lined baking sheet. Chill for 10–15 minutes until firm.
Melt coating
Melt 8 ounces white chocolate or candy melts in the microwave in short bursts or over a double boiler until smooth. Keep warm but avoid overheating to prevent seizing.
Dip and set
Dip chilled balls into the melted coating using a fork, tap off excess, and return to the parchment. Allow the coating to set in the refrigerator for about 10 minutes.
Drizzle and decorate
Melt red candy melts in a piping or zip-top bag, snip a small corner, and drizzle over the set truffles. Immediately sprinkle with green sanding sugar and chill until fully set.
Store and serve
Store in an airtight container in the refrigerator for up to 7 days or freeze for up to 3 months. Thaw in the refrigerator before serving.
Last Step: Please leave a rating and comment letting us know how you liked this recipe! This helps our business to thrive and continue providing free, high-quality recipes for you.
Nutrition
Did You Make This?
Leave a comment & rating below or tag
@snapyrecipe on social media!
Categories:
You might also like...
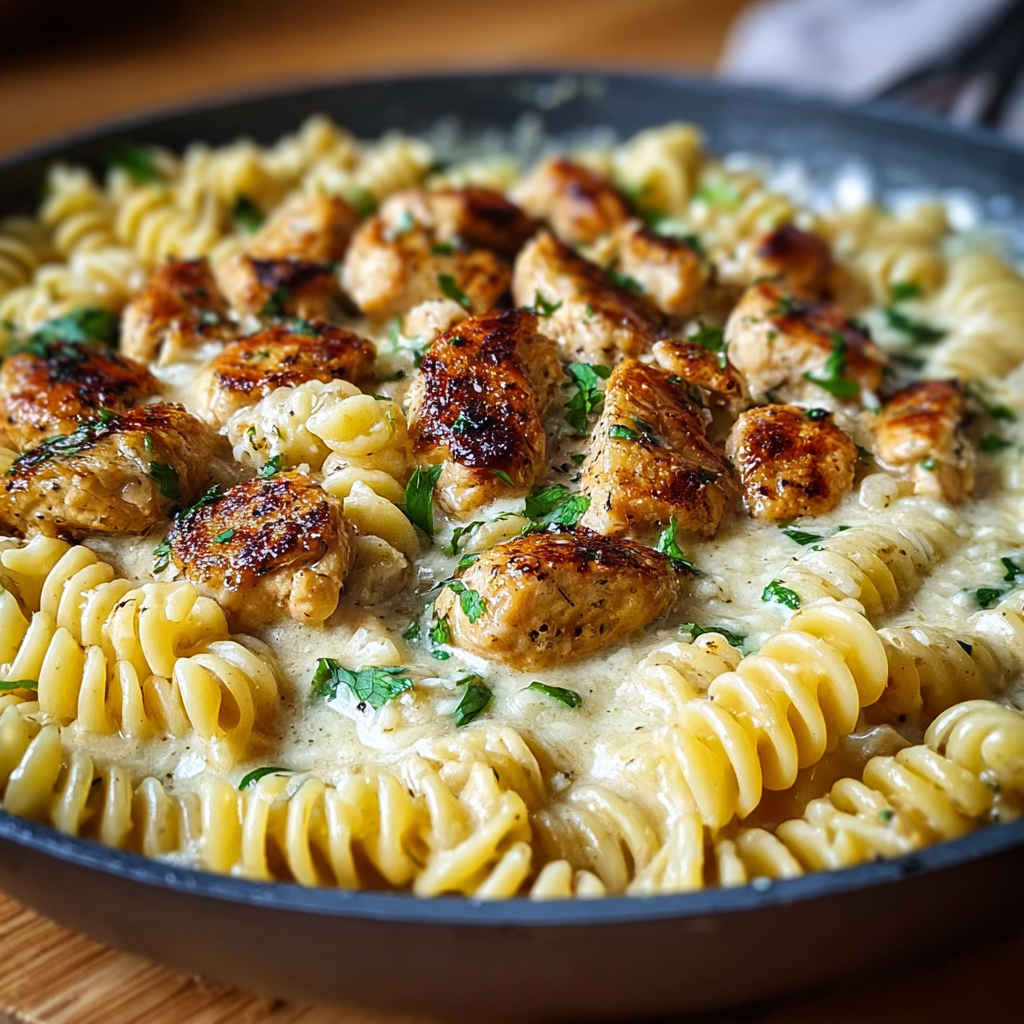
Creamy Garlic Butter Chicken & Rotini in Parmesan Sauce
Golden-browned chicken tossed with rotini in a silky garlic Parmesan sauce—comforting, quick, and perfect for weeknight dinners.
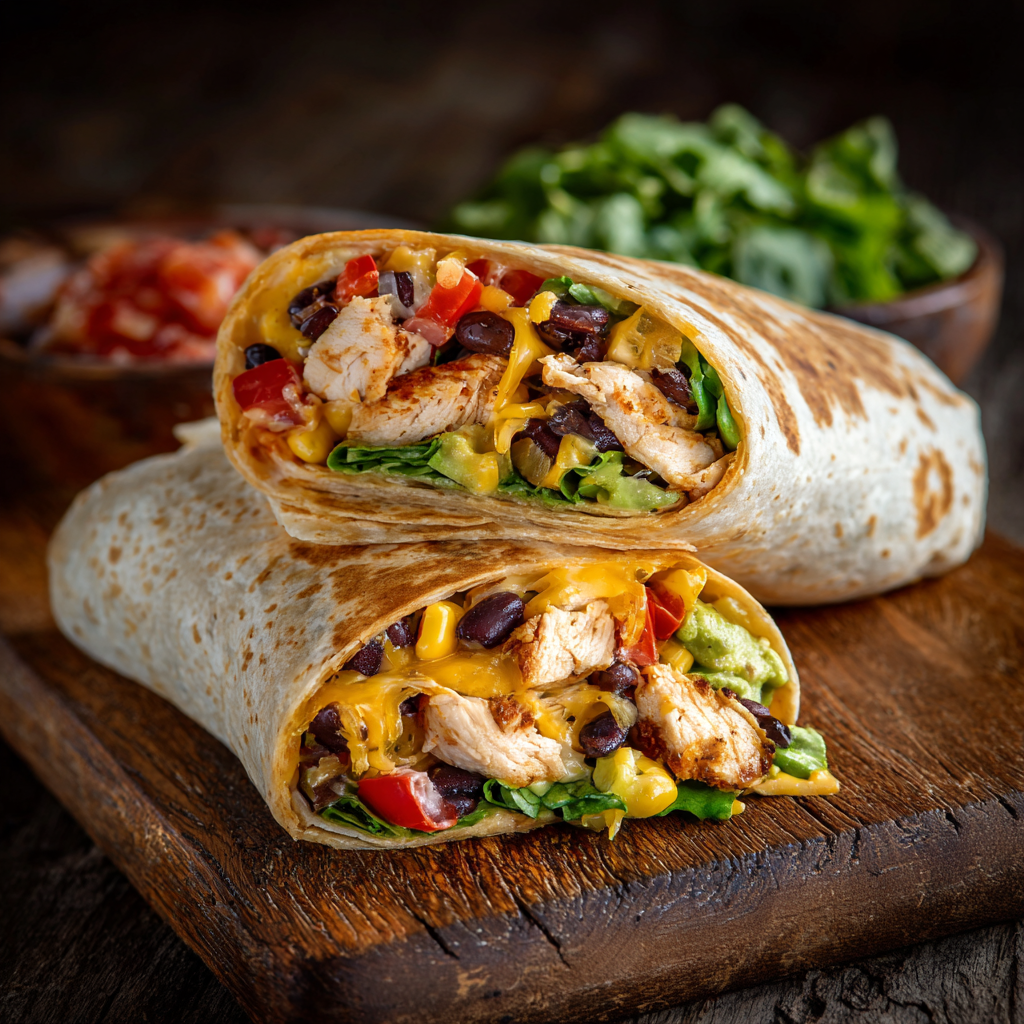
Southwest Chicken Wrap
A vibrant, smoky Southwest chicken wrap loaded with rice, beans, corn, and a creamy chipotle-lime sauce — perfect for lunch, meal prep, or an easy weeknight.

Classic Apple Crumble
A timeless apple crumble with a buttery, cinnamon-scented topping and tart-sweet Granny Smith filling — perfect warm with vanilla ice cream.
Did You Make This?
Leave a comment & rating below or tag @snapyrecipe on social media!
Rate This Recipe
Share This Recipe
Enjoyed this recipe? Share it with friends and family, and don't forget to leave a review!
Comments (1)
This recipe looks amazing! Can't wait to try it.
Comments are stored locally in your browser. Server comments are displayed alongside your local comments.
Hi, I'm Natalia!
What's Popular

Get My 30-Minute Meals email series!
Quick and easy dinner ideas delivered to your inbox.