
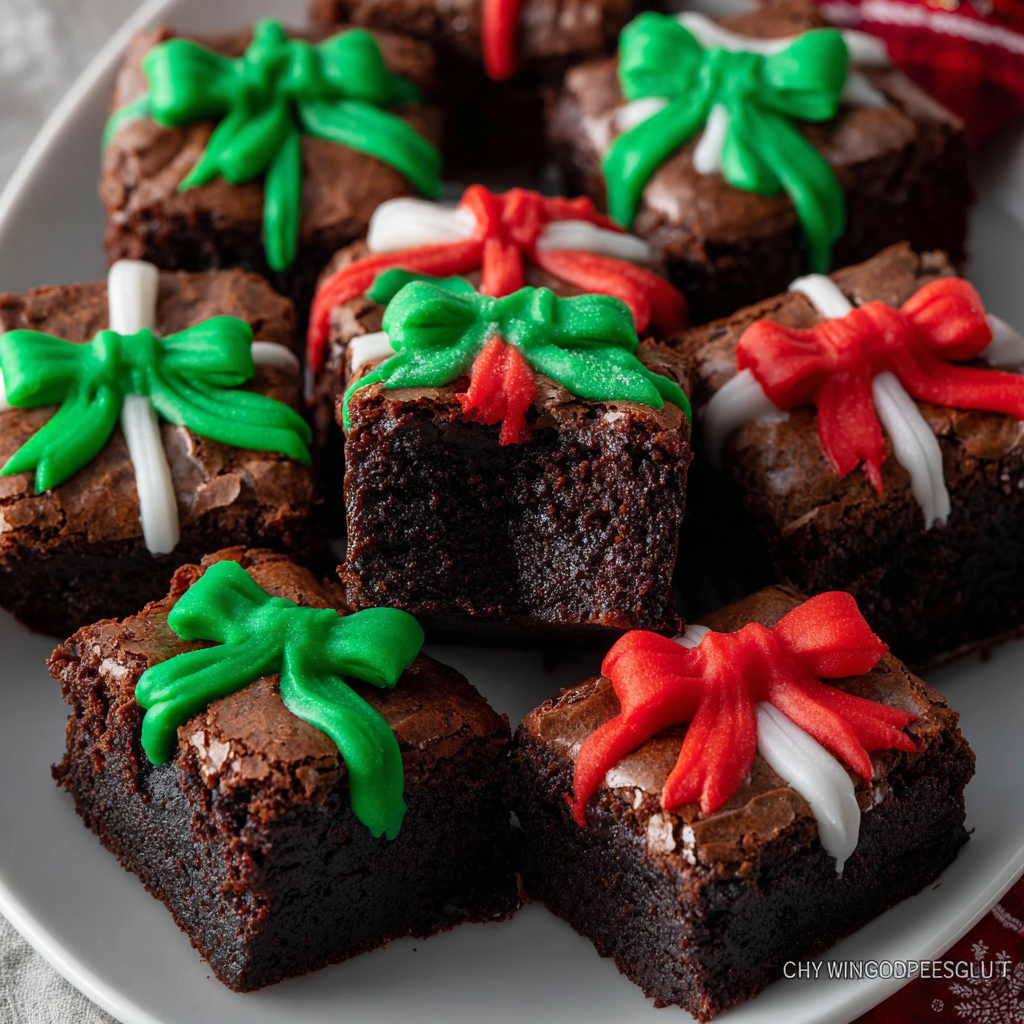
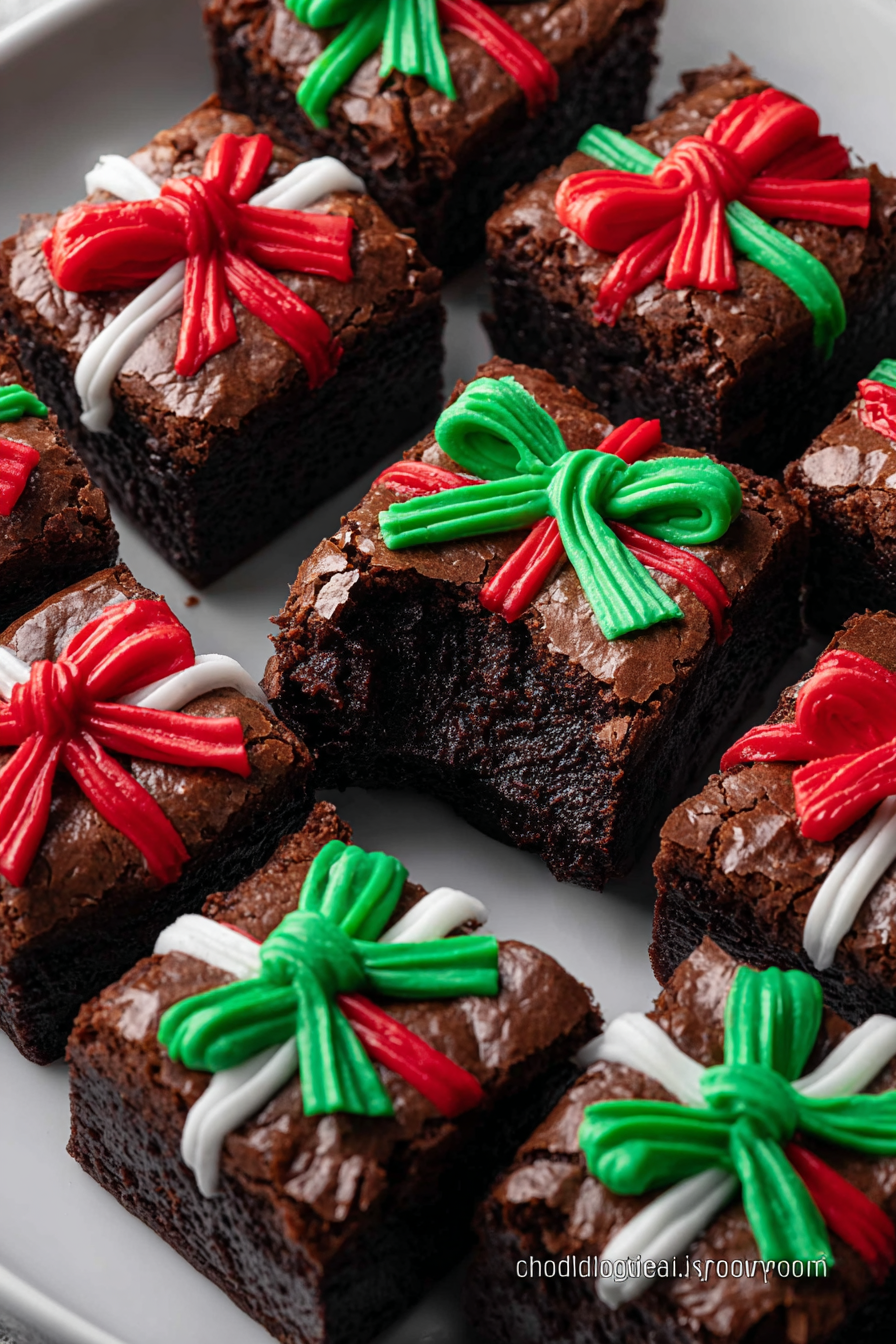
Christmas Present Brownies

Fudgy, festive brownies decorated to look like tiny wrapped presents—perfect for holiday parties, gift boxes, or a cozy night by the tree.
Why You'll Love This Recipe
- This recipe yields deeply fudgy squares with a glossy top and chewy edge, ready in about an hour from start to finish and using pantry-friendly ingredients.
- Decorating is fast and forgiving: candy melts soften quickly and pipe beautifully, making ribbon lines and bows accessible to bakers of all skill levels.
- Make-ahead friendly—brownies hold up well refrigerated for a few days and freeze beautifully, so you can prepare them for parties in advance.
- Scales well: bake in a 9x13 pan for many guests or halve the batch for a smaller gathering; the technique stays the same.
- Kid-tested and crowd-approved—the colorful toppings make these a hit at classroom parties and family gatherings while staying simple enough for weeknight baking.
When I shared these the first time with neighbors, everyone asked for the secret: the sugar is melted into the butter, which gives a smoother batter and a fudgier crumb. My family’s favorite moment is the decorating station—each person picks a ribbon color and places a tiny bow. It turns baking into a memory, not just a task.
Ingredients
- Unsalted butter (1 cup / 2 sticks): Use real butter for the best flavor and glossy texture; I prefer European-style butter for a slightly richer taste. Melted gently over low heat, it helps create a luxuriously fudgy base.
- Granulated sugar (2 cups): Standard white sugar gives the shiny top and helps set the structure; don’t substitute with liquid sweeteners without adjusting other ratios.
- Large eggs (4): At room temperature, they blend evenly and contribute to the glossy, thick batter; cold eggs can seize the butter and sugar mixture.
- Vanilla extract (1 teaspoon): Pure vanilla brightens the chocolate; avoid imitation for the best aroma.
- All-purpose flour (1 cup): Provides structure while keeping the overall texture dense and tender; measure by spooning into the cup and leveling for accuracy.
- Unsweetened cocoa powder (1 cup): Use a high-quality cocoa (natural or Dutch-processed depending on your taste) for intense chocolate flavor; sift to remove lumps.
- Baking powder (1/2 teaspoon) and salt (1/4 teaspoon): Small amounts lift and season the batter so the chocolate notes pop.
- Semi-sweet chocolate chips (1 cup, optional): Fold in for added pockets of melted chocolate; Ghirardelli or Guittard work well if you want reliable melting and flavor.
- Red, green, and white candy melts: For decorating—choose brand-stable candy melts designed for piping and drizzling, or use white chocolate tinted with oil-based colors if preferred.
- Mini candy bows or holiday sprinkles (optional): Adds charm and texture; pick small, edible decorations that adhere well to melted candy.
Instructions
Prepare the pan and oven: Preheat the oven to 350°F (175°C). Line a 9x13-inch baking pan with parchment paper, leaving an overhang on two sides for easy removal. This overhang will let you lift the whole slab out cleanly, which is essential for neat squares and decorating later. Melt butter and combine with sugar: In a medium saucepan over low heat, melt the 1 cup (2 sticks) of unsalted butter until just liquid—avoid browning. Remove from heat and whisk in 2 cups granulated sugar until the mixture looks smooth and glossy. Cooling slightly prevents the eggs from scrambling when added; wait 2–3 minutes. Add eggs and vanilla: Whisk in the 4 large eggs, one at a time, until the batter becomes thick and syrupy. Add 1 teaspoon vanilla extract. Continuous whisking and slightly cooled butter-sugar mix encourage a shiny, cohesive batter that yields fudgy texture. Sift and fold dry ingredients: Sift together 1 cup all-purpose flour, 1 cup unsweetened cocoa powder, 1/2 teaspoon baking powder, and 1/4 teaspoon salt into a medium bowl. Gradually fold the dry mix into the wet batter with a rubber spatula until just combined—stop when no streaks remain. Overmixing will incorporate air and make the final crumb cakier rather than dense and fudgy. Optional chocolate chips: Fold in 1 cup semi-sweet chocolate chips if using—this adds pockets of gooey, melted chocolate. Reserve a handful to sprinkle on top for a pretty finish if you like. Bake: Pour batter into the prepared pan and smooth the top. Bake at 350°F for 30–35 minutes; check at 30 minutes. Insert a toothpick in the center—you want a few moist crumbs attached, not wet batter. The brownies will continue to set as they cool. Cool, cut, and decorate: Let brownies cool completely in the pan on a wire rack. Use the parchment overhang to lift the slab onto a cutting board and slice into even squares (about 24). Melt candy melts in separate bowls in 15-second bursts in the microwave, stirring until smooth. Pipe or drizzle crisscross lines to mimic ribbons, and top with mini bows or sprinkles while the candy is still tacky. Set and serve: Allow candy decorations to harden at room temperature, or speed up the process in the refrigerator for 10–15 minutes. Arrange on a platter or pack into gift boxes lined with parchment for beautiful edible gifts.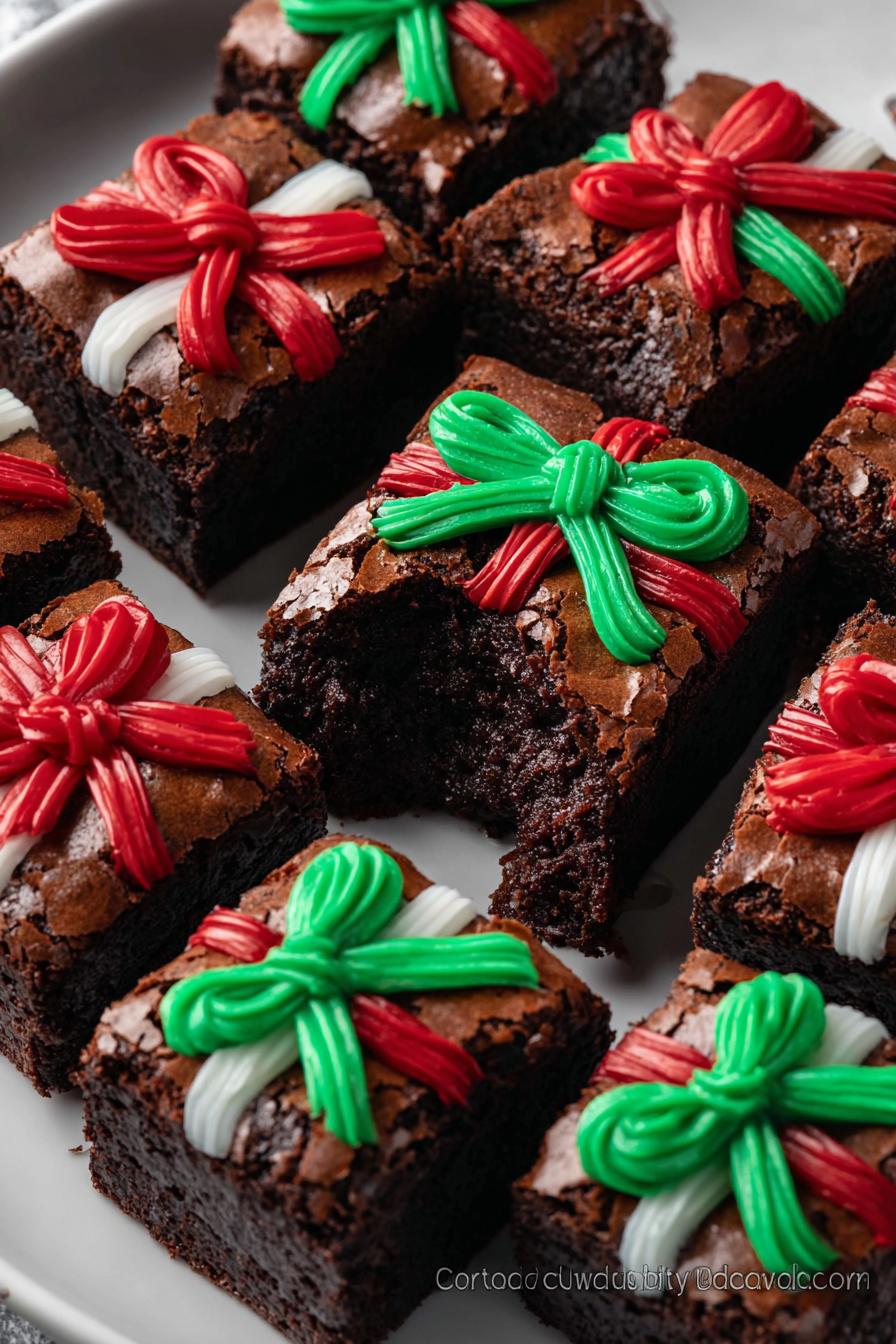
You Must Know
- These squares freeze well for up to 3 months—wrap individual pieces in plastic, then store in a freezer-safe container to protect the candy decorations.
- Because the sugar is melted with butter, the batter produces a dense, fudgy crumb; avoid overbaking to preserve that texture.
- Decorations set fastest when brownies are fully cool; if you decorate warm brownies the candy will bleed or slide.
- High in chocolate and rich in calories—ideal as an occasional holiday treat or small, shareable bites at gatherings.
What I love most about this variation is how it transforms the humble brownie into something celebratory with only a few extra steps. Every holiday when I bring a tray, someone inevitably asks if they can take a few for later. The combination of chewy center and glossy candy ribbons gets rave reviews, and the process of decorating together becomes part of the fun—children especially love choosing colors and placing tiny bows.
Storage Tips
Store cooled and decorated squares in an airtight container at room temperature for up to 4 days; use parchment sheets between layers to protect the ribbons. For longer storage, freeze undecorated squares tightly wrapped for up to 3 months and decorate after thawing for the freshest finish. To refresh slightly stale pieces, warm gently in a 300°F oven for 5–7 minutes, then cool before decorating. Refrigeration will firm candy faster but may dull the texture of the brownie slightly; bring to room temperature before serving for best flavor.
Ingredient Substitutions
Swap semi-sweet chips for dark chocolate for a less sweet option, or use milk chocolate if you prefer a creamier bite. To make them nut-free, avoid any chips or toppings that include nut traces. For a gluten-free version, replace all-purpose flour with a 1-for-1 cup gluten-free baking blend. If you need dairy-free, use vegan butter and dairy-free chocolate chips—note that texture will be slightly different and may be less glossy. If candy melts aren’t available, pipe melted white chocolate colored with oil-based food color for ribbon effects.
Serving Suggestions
Serve these squares on a festive platter with fresh cranberries or sugared rosemary sprigs for a holiday aesthetic. They pair beautifully with strong coffee or a creamy hot chocolate, and make elegant favors when boxed individually with tissue paper. For a party, arrange different ribbon colors to create themed assortments—red and gold, green and white—so guests can choose by color. Small forks or toothpicks are handy for bite-sized portions at mingling events.
Cultural Background
Decorated sweets have long been a part of winter celebrations across many cultures; turning baked goods into gifts echoes traditions of sharing homemade treats during the holidays. The idea of wrapping brownies like presents draws on the visual language of gift-giving—ribbon, bow, and neat squares—which elevates a familiar comfort food into a festive offering. Similar traditions include decorated gingerbread and holiday cookie exchanges, where appearance is as joyful as flavor.
Seasonal Adaptations
In winter, add warming spices like 1/2 teaspoon cinnamon or a pinch of ground ginger to the dry mix for a cozy twist. For spring or summer events, switch to pastel-colored melts and floral sprinkles. For Valentine’s Day, use pink and red candy melts and heart-shaped sprinkles. You can also fold in crushed peppermint candy for a seasonal crunch and minty finish—just sprinkle lightly on top after piping the ribbons.
Meal Prep Tips
Make the slab one day ahead, cool, then wrap tightly and store until the day of your event; decorate just before serving for the freshest look. If you’re preparing gifts, assemble boxes and labels in advance and store the brownies in the refrigerator until packing time to prevent smudging. For large batches, bake multiple pans and freeze the undecorated slabs; thaw overnight in the refrigerator and finish with melted candy the next day.
These Christmas Present Brownies are simple to make and endlessly adaptable—perfect for sharing, gifting, and making cozy holidays even sweeter. Try them once and I guarantee they’ll become a repeat favorite at your gatherings.
Pro Tips
Measure flour by spooning into the cup and leveling off to avoid dense, dry brownies.
Allow the butter-sugar mixture to cool slightly before adding eggs to prevent curdling.
Use a serrated knife warmed under hot water and dried between cuts for cleaner squares.
This nourishing christmas present brownies recipe is sure to be a staple in your kitchen. Enjoy every moist, high protein slice — it is perfect for breakfast or as a wholesome snack any time.
FAQs about Recipes
Can I freeze these brownies?
Yes—freeze undecorated squares wrapped tightly for up to 3 months. Thaw in the refrigerator overnight, bring to room temperature, and decorate.
How can I make these less fudgy and more cake-like?
If you prefer a cakier texture, reduce the butter by 2 tablespoons and fold the batter slightly more; baking time may increase by a few minutes.
Tags
Christmas Present Brownies
This Christmas Present Brownies recipe makes perfectly juicy, tender, and flavorful steak every time! Serve with potatoes and a side salad for an unforgettable dinner in under 30 minutes.
Ingredients
Brownie
Instructions
Prepare pan and oven
Preheat oven to 350°F (175°C). Line a 9x13-inch pan with parchment paper, leaving an overhang for easy removal.
Melt butter and combine with sugar
Melt 1 cup (2 sticks) unsalted butter over low heat, remove from heat, and whisk in 2 cups granulated sugar until smooth and glossy. Cool slightly before adding eggs.
Add eggs and vanilla
Whisk in 4 large room-temperature eggs one at a time, then add 1 teaspoon vanilla extract until the mixture is thick and glossy.
Fold in dry ingredients
Sift together 1 cup all-purpose flour, 1 cup cocoa powder, 1/2 teaspoon baking powder, and 1/4 teaspoon salt. Fold into the wet mixture until just combined; avoid overmixing.
Optional chocolate chips and bake
Fold in 1 cup semi-sweet chocolate chips if desired. Pour into prepared pan and bake 30–35 minutes until a toothpick shows moist crumbs.
Cool, cut, and decorate
Cool completely in the pan, lift out using parchment, cut into squares, and decorate with melted candy melts piped as ribbon lines. Add mini bows or sprinkles while candy is tacky.
Set decorations and serve
Allow decorations to set at room temperature or refrigerate 10–15 minutes. Arrange on a platter or pack into gift boxes.
Last Step: Please leave a rating and comment letting us know how you liked this recipe! This helps our business to thrive and continue providing free, high-quality recipes for you.
Nutrition
Did You Make This?
Leave a comment & rating below or tag
@snapyrecipe on social media!
Categories:
You might also like...
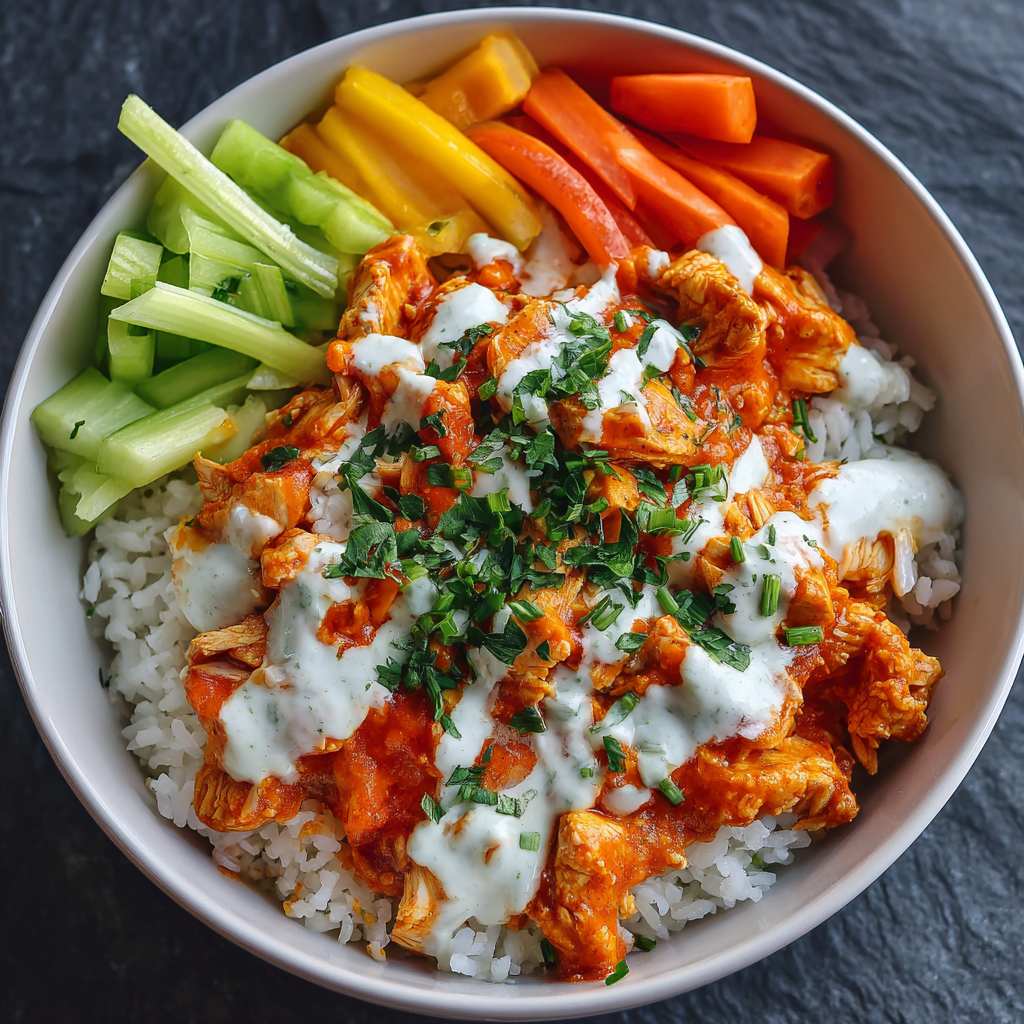
Creamy Garlic Butter Chicken & Rotini in Parmesan Sauce
Golden-browned chicken tossed with rotini in a silky garlic Parmesan sauce—comforting, quick, and perfect for weeknight dinners.
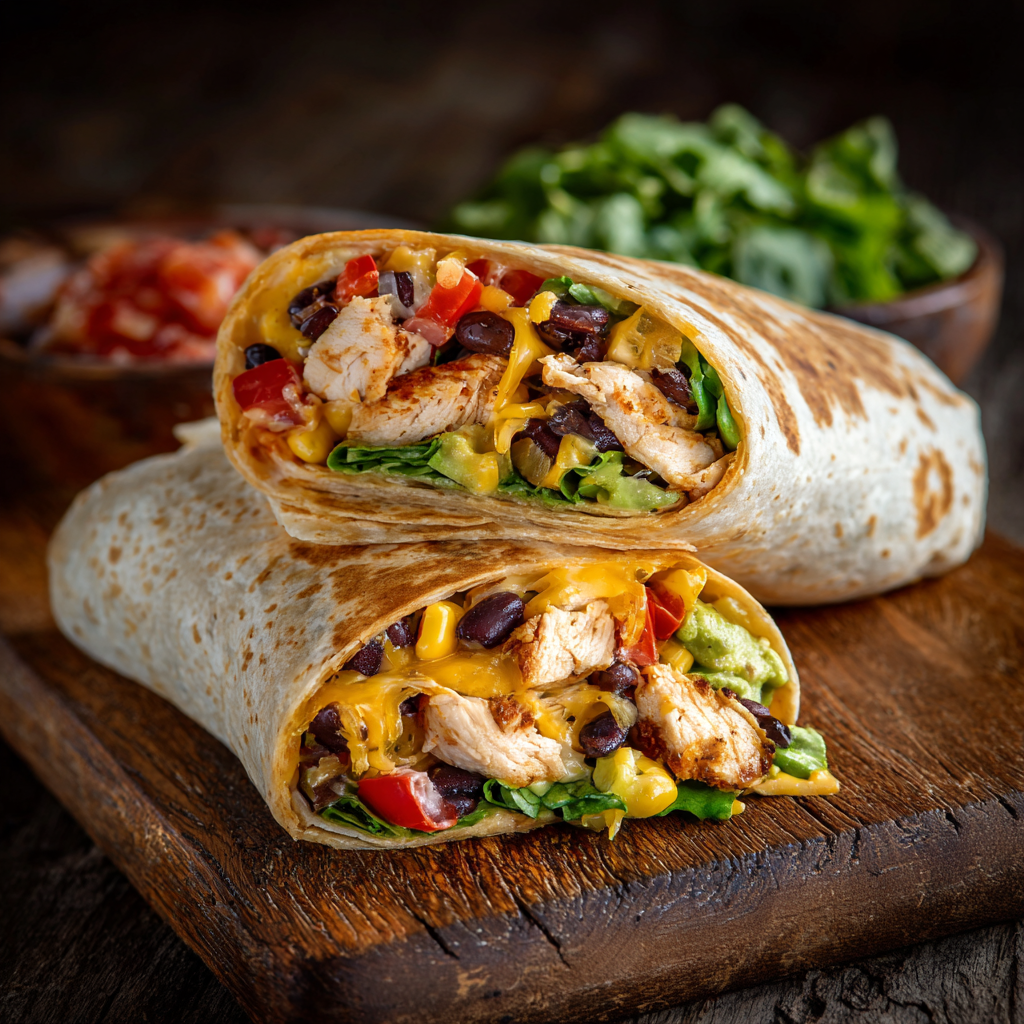
Southwest Chicken Wrap
A vibrant, smoky Southwest chicken wrap loaded with rice, beans, corn, and a creamy chipotle-lime sauce — perfect for lunch, meal prep, or an easy weeknight.

Classic Apple Crumble
A timeless apple crumble with a buttery, cinnamon-scented topping and tart-sweet Granny Smith filling — perfect warm with vanilla ice cream.
Did You Make This?
Leave a comment & rating below or tag @snapyrecipe on social media!
Rate This Recipe
Share This Recipe
Enjoyed this recipe? Share it with friends and family, and don't forget to leave a review!
Comments (1)
This recipe looks amazing! Can't wait to try it.
Comments are stored locally in your browser. Server comments are displayed alongside your local comments.
Hi, I'm Natalia!
What's Popular
Get My 30-Minute Meals email series!
Quick and easy dinner ideas delivered to your inbox.