
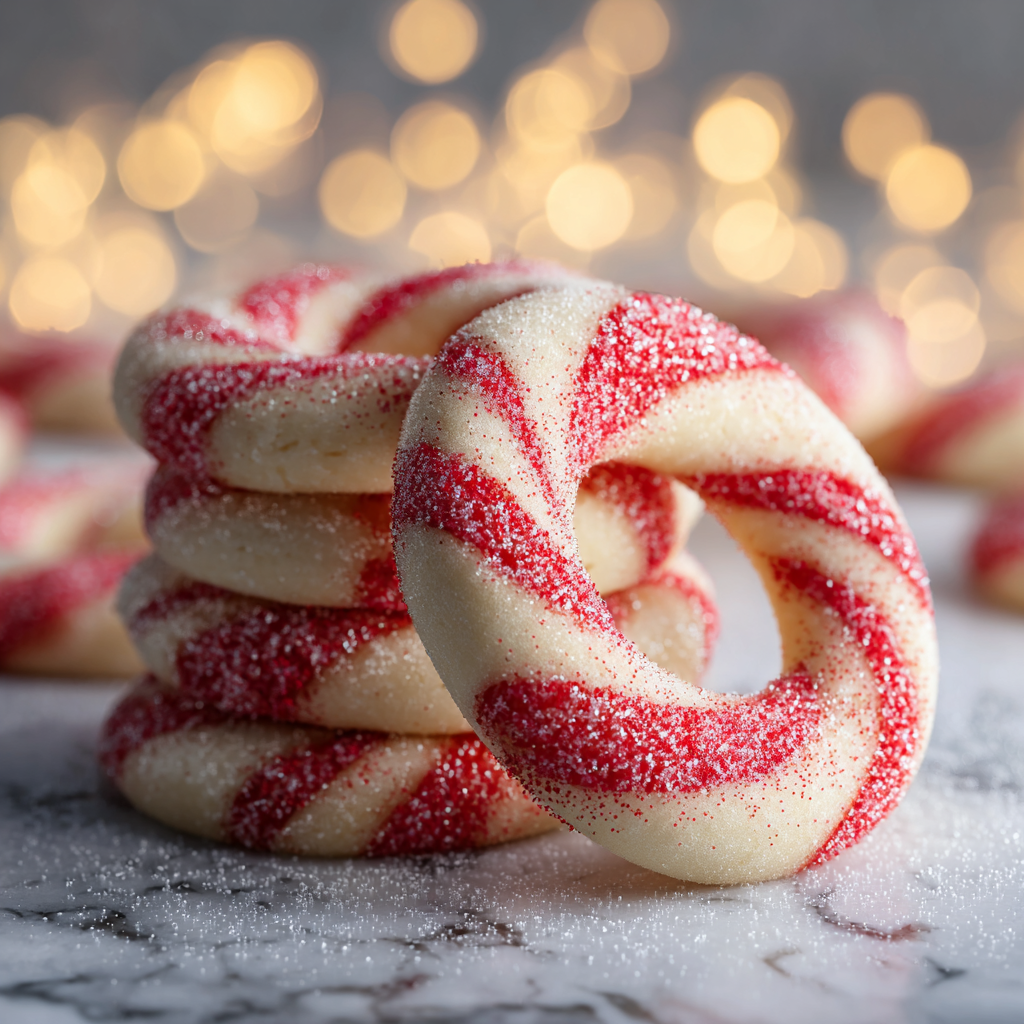
Candy Cane Cookies

Buttery, melt-in-your-mouth cookies twisted into cheerful candy cane shapes with a hint of peppermint — perfect for holiday baking, cookie exchanges, or a cozy afternoon treat.
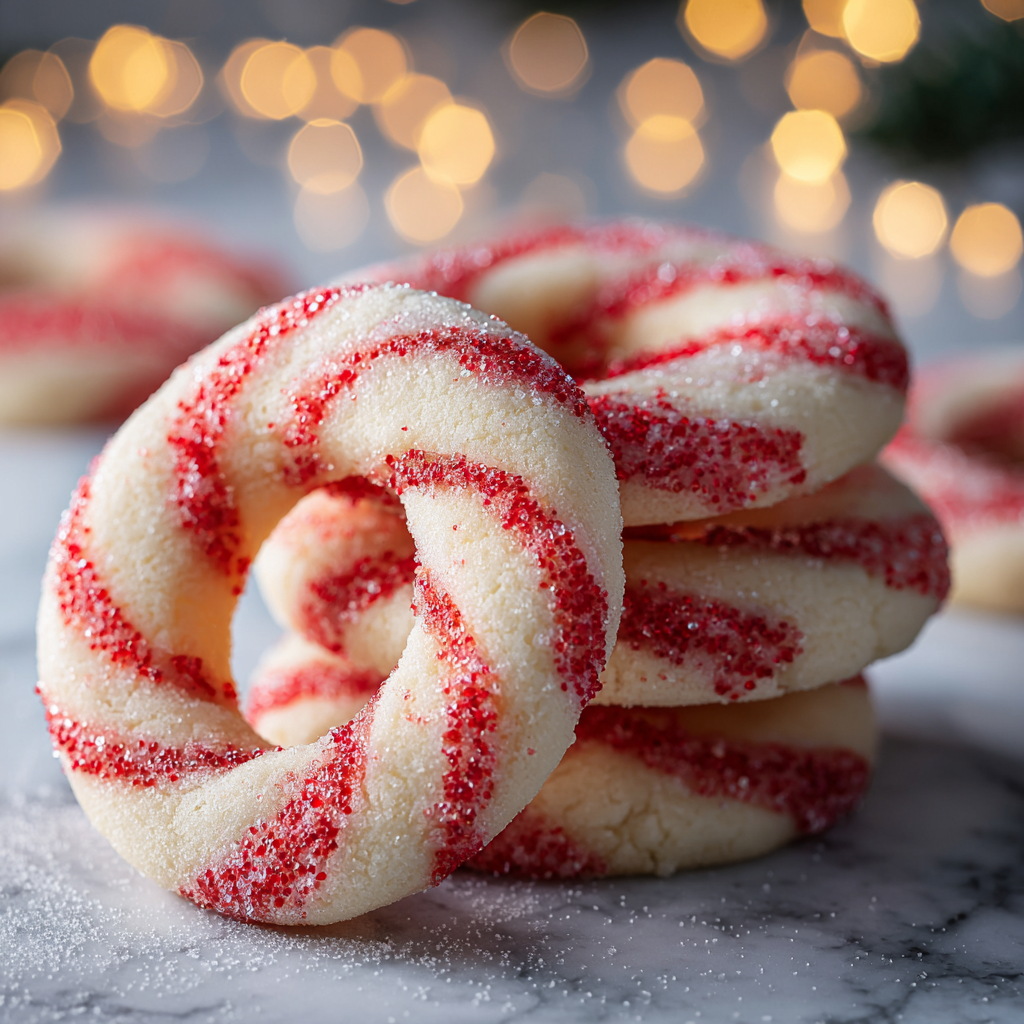
This recipe for Candy Cane Cookies has been my festive staple for as long as I can remember. I first baked them on a quiet December afternoon when I wanted something more charming than a simple drop cookie to tuck into little holiday boxes. The dough is simple — rich butter, a whisper of peppermint, and powdered sugar for a tender crumb — but the trick is in the shaping. Rolling paired ropes of white and red dough, twisting them together, and bending the top into a cane is oddly meditative. The result is a cookie that looks special even before the first bite.
The flavor is bright and nostalgic: a buttery shortbread base with a subtle peppermint note that isn’t overpowering. Texture-wise, these cookies are tender and slightly crisp at the edges, with just enough structure to hold their candy cane shape without crumbling. I’ve gifted trays of these at work parties and family gatherings — they disappear quickly and always spark a few smiles. They’re a lovely project to make with kids (portioning the ropes and twisting) and equally satisfying to craft alone with a cup of tea.
Why You'll Love This Recipe
- Simple ingredients you likely already have: unsalted butter, powdered sugar, vanilla, peppermint extract, all-purpose flour, and a touch of salt — nothing exotic required.
- Quick to prepare: active time is about 20 minutes and bake time is 8–10 minutes, so you can make a batch in under 40 minutes from start to finish.
- Great for gifting and parties: the candy cane shape looks impressive without advanced decorating skills, and the cookies stack and transport well.
- Make-ahead friendly: dough keeps well in the refrigerator for a day or freezes for longer storage, making these perfect for holiday prep.
- Kid-friendly technique: shaping is tactile and fun, turning baking into a hands-on craft activity for little helpers.
- Customizable flavor: swap peppermint for almond or orange extract to create different seasonal versions.
Every time I make this batch, my sister texts me a photo of the finished plate — it’s become our unofficial holiday check-in. The first time I shaped and baked a sheet, my toddler insisted on “helping with the twist,” which produced delightfully lopsided canes that tasted just as wonderful. Those cookies are still the family favorite because the care and laughter baked into them are as important as the ingredients.
Ingredients
- Unsalted butter (1 cup): Use high-quality butter like Plugrá or Kerrygold for best flavor; it contributes richness and tenderness. Soften to room temperature (not melted) so it creams smoothly with the powdered sugar.
- Powdered sugar (1 cup): Also called confectioners’ sugar; it dissolves into the butter to create a silky, tender crumb. Sift if lumpy.
- Egg (1 large): Adds structure and moisture. Use room-temperature egg to help the dough emulsify evenly.
- Vanilla extract (1 teaspoon): Use pure vanilla extract for the best aroma; it rounds the flavor of the butter and sugar.
- Peppermint extract (1/2 teaspoon): A little goes a long way; start with 1/2 teaspoon to avoid an overpowering minty bite.
- All-purpose flour (2 1/2 cups): Spoon and level into the measuring cup for accuracy. This amount yields a dough that is soft but not sticky.
- Salt (1/2 teaspoon): Enhances all flavors — do not skip. Use fine sea salt or table salt.
- Red gel food coloring (as needed): Gel coloring gives a vivid red without thinning the dough. Add sparingly — a little goes far.
Instructions
Preheat and prepare pans: Preheat oven to 375°F (190°C). Line baking sheets with parchment paper or silicone mats to ensure even baking and easy removal. If you plan to bake multiple sheets at once, rotate them halfway through baking for the most even browning. Cream butter and sugar: In a stand mixer fitted with the paddle or using a hand mixer, beat the softened butter and powdered sugar together on medium speed for 3–4 minutes until pale and fluffy. Scrape the bowl once or twice so everything aerates evenly; this aeration creates the light texture in the finished cookie. Add egg and extracts: Beat in the room-temperature egg, vanilla extract, and peppermint extract until smooth and fully incorporated. Mix just until homogenous — overbeating after adding the egg can develop gluten once the flour goes in. Mix dry ingredients: Whisk the flour and salt together, then add gradually to the wet ingredients on low speed. Mix until a soft, non-sticky dough forms. Stop mixing as soon as the flour disappears to avoid a tough texture. Divide and color: Divide the dough in half. Add a small amount of red gel coloring to one half and knead gently in the bowl or on a clean surface until color is even. Use a toothpick to add color bit by bit — gel is concentrated and can quickly become too dark. Shape canes: Portion 1 teaspoon of each color and roll into 4-inch ropes. Place a white and a red rope side by side, press lightly to adhere, then twist once or twice and bend the top to form the cane hook. If the dough warms and becomes sticky, chill ropes for 5 minutes to firm up before shaping. Bake and cool: Bake 8–10 minutes, rotating the sheet if needed, until the bottoms are lightly golden but the tops remain pale. Let cookies cool on the pan for 5 minutes to set, then transfer to a wire rack to cool completely.
You Must Know
- These cookies keep well in an airtight container at room temperature for up to 5 days and freeze perfectly for up to 3 months — freeze on a tray then transfer to a freezer-safe bag to protect the shape.
- High in simple carbs and fat due to butter and powdered sugar; portion control makes them a delightful occasional treat.
- The peppermint flavor is concentrated; use pure peppermint extract rather than mint-flavored vanilla for clarity of flavor.
- Use gel coloring to avoid altering dough consistency; liquid coloring can make the dough sticky and harder to shape.
What I love most about this dough is its reliability: it’s forgiving if you warm it slightly during shaping, and you can always firm it up with a brief chill. The real joy, though, comes from assembly — I often make a double batch so I have extras for gifting. Watching friends select a perfectly twisted cane from a tin never fails to lift my spirits.
Storage Tips
Store cooled cookies in a single layer or with parchment between layers in an airtight container at room temperature for up to 5 days. For longer storage, arrange baked cookies in a single layer on a baking tray and freeze until firm (about 1 hour), then transfer to a freezer-safe zip-top bag for up to 3 months. Thaw at room temperature in the sealed bag to prevent condensation. If you prefer to freeze dough, shape the ropes, freeze them on a tray until firm, then transfer to a bag; bake from frozen, adding 1–2 minutes to the bake time.
Ingredient Substitutions
If you need dairy-free options, use a high-quality non-dairy baking stick margarine and be mindful that texture may be slightly different — cookies can spread more. For a gluten-free version, use a 1:1 gluten-free flour blend and add 1/4 teaspoon xanthan gum if your blend lacks binding agents; bake time may increase by a minute or two. If peppermint isn’t your preference, substitute with 1 teaspoon almond extract for a sweeter, nuttier cookie or 1 teaspoon orange extract for a bright citrus twist; reduce if using concentrated extracts.
Serving Suggestions
Serve these with hot cocoa, mulled cider, or a pot of black tea for a classic holiday pairing. Arrange them on a bed of evergreen sprigs for a festive platter or tie small stacks with baker’s twine for a charming edible gift. For a party, pair with simple sugar cookies, chocolate-dipped shortbread, or spiced ginger snaps to create a varied cookie tray that balances peppermint with richer flavors.
Cultural Background
The candy cane shape evokes classic Western holiday symbolism, historically tied to Christmas traditions. While shaped confections have long existed in many cultures, the striped candy cane as we know it became popular in 19th-century Europe and America. Translating that iconic look into baked form is a playful nod to those confectionery roots, combining the visual nostalgia of candies with the buttery comfort of cookies.
Seasonal Adaptations
In winter, keep the peppermint as written. For spring, swap peppermint for lemon zest and a teaspoon of lemon extract and tint the second half of dough pale pink or green. For fall, replace peppermint with 1 teaspoon ground cinnamon and add a tablespoon of brown sugar to the dough for warmth; shape as twists or simple logs instead of canes for a harvest look.
Meal Prep Tips
To streamline holiday baking, make the dough up to 48 hours ahead and keep it chilled wrapped tightly in plastic. Pre-measure the portions onto parchment-lined trays and refrigerate so the rolling and shaping step becomes fast and assembly-line style. Bake in batches, letting trays cool between bakes, and move finished cookies to a wire rack. For gifting, stack cookies with parchment between layers and use a rigid box to prevent crushing.
These candy cane treats are more than a seasonal snack — they’re a chance to slow down, shape something by hand, and share a little cheer. Whether you’re baking with children, prepping for a cookie swap, or packing small gifts for neighbors, these cookies are reliably delightful. I hope they become a regular in your holiday rotation too.
Pro Tips
Use gel food coloring to avoid altering dough consistency; liquid food coloring can make the dough sticky.
Keep the dough cool while shaping; if it becomes too soft, chill for 5–10 minutes to firm up.
Measure flour by spooning it into the cup and leveling off to avoid a dense dough.
Sift powdered sugar if it has lumps to ensure a smooth creaming with butter.
Bake until the bottoms are just lightly golden — this prevents over-browning while keeping the center tender.
This nourishing candy cane cookies recipe is sure to be a staple in your kitchen. Enjoy every moist, high protein slice — it is perfect for breakfast or as a wholesome snack any time.
FAQs about Recipes
How long do these cookies keep?
Store in an airtight container at room temperature for up to 5 days, or freeze for up to 3 months. For freezing baked cookies, flash-freeze on a tray then transfer to a freezer bag.
Can I freeze the shaped dough?
Yes — shape the ropes, freeze on a tray until firm, then transfer to bags. Bake from frozen, adding 1–2 minutes to the bake time.
Tags
Candy Cane Cookies
This Candy Cane Cookies recipe makes perfectly juicy, tender, and flavorful steak every time! Serve with potatoes and a side salad for an unforgettable dinner in under 30 minutes.
Ingredients
Dough
Instructions
Preheat and prepare pans
Preheat oven to 375°F (190°C). Line baking sheets with parchment paper or silicone mats. If making multiple sheets, plan to rotate them midway through baking for even color.
Cream butter and sugar
Beat the softened butter and powdered sugar for 3–4 minutes until pale and fluffy, scraping down the bowl once to ensure even aeration and a light texture.
Add egg and extracts
Beat in the room-temperature egg, vanilla, and peppermint extract until smooth and fully incorporated, mixing just until homogeneous to prevent overdevelopment of gluten later.
Mix dry ingredients
Whisk the flour and salt together, then add gradually to the wet mixture on low speed. Mix until a soft, non-sticky dough forms and stop as soon as flour is incorporated.
Divide and color
Divide dough in half. Add a small amount of red gel food coloring to one half and knead gently until evenly colored. Add color sparingly to avoid overwhelming the dough.
Shape canes
Portion 1 teaspoon of each color, roll into 4-inch ropes, place side by side, press lightly to adhere, twist, and bend the top into a cane shape. Chill briefly if dough softens.
Bake and cool
Bake 8–10 minutes until bottoms are lightly golden. Cool on the pan for 5 minutes to set, then transfer to a wire rack to cool completely.
Last Step: Please leave a rating and comment letting us know how you liked this recipe! This helps our business to thrive and continue providing free, high-quality recipes for you.
Nutrition
Did You Make This?
Leave a comment & rating below or tag
@snapyrecipe on social media!
Categories:
You might also like...
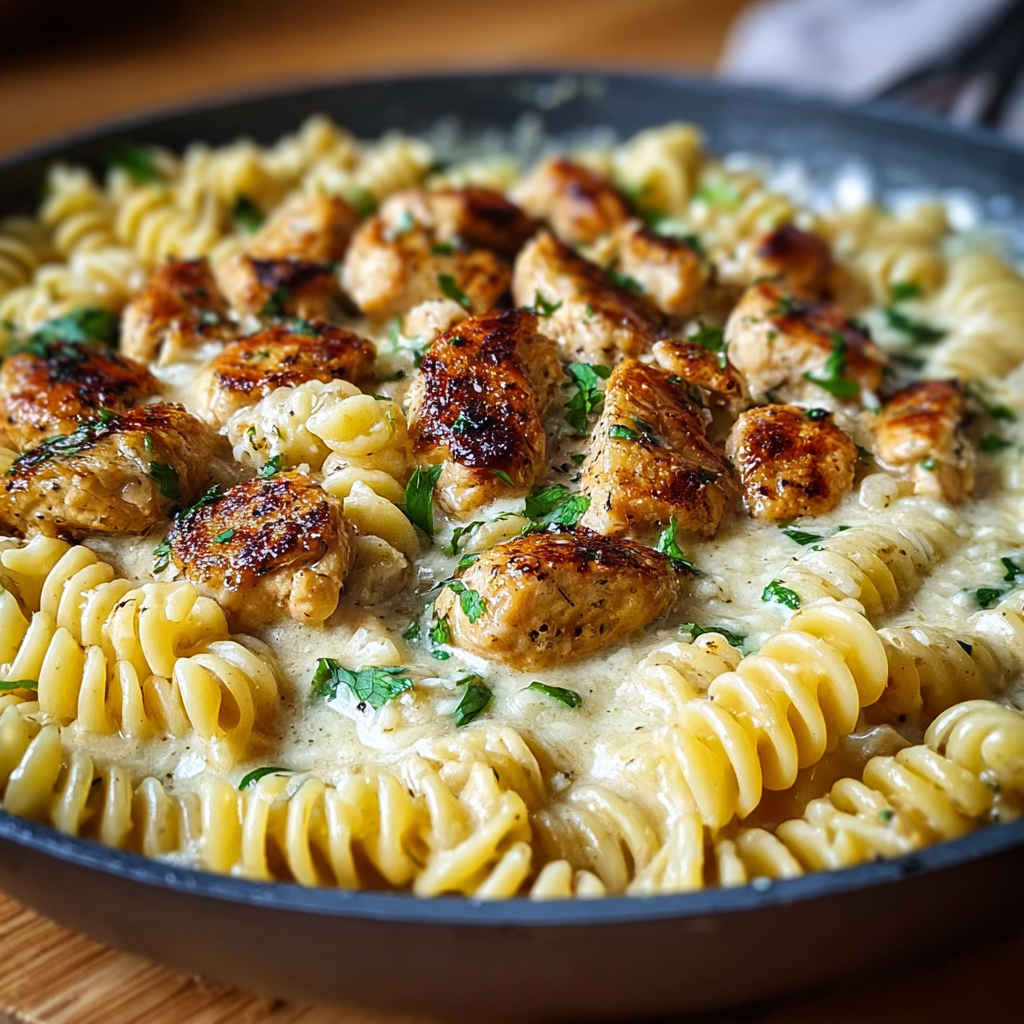
Creamy Garlic Butter Chicken & Rotini in Parmesan Sauce
Golden-browned chicken tossed with rotini in a silky garlic Parmesan sauce—comforting, quick, and perfect for weeknight dinners.
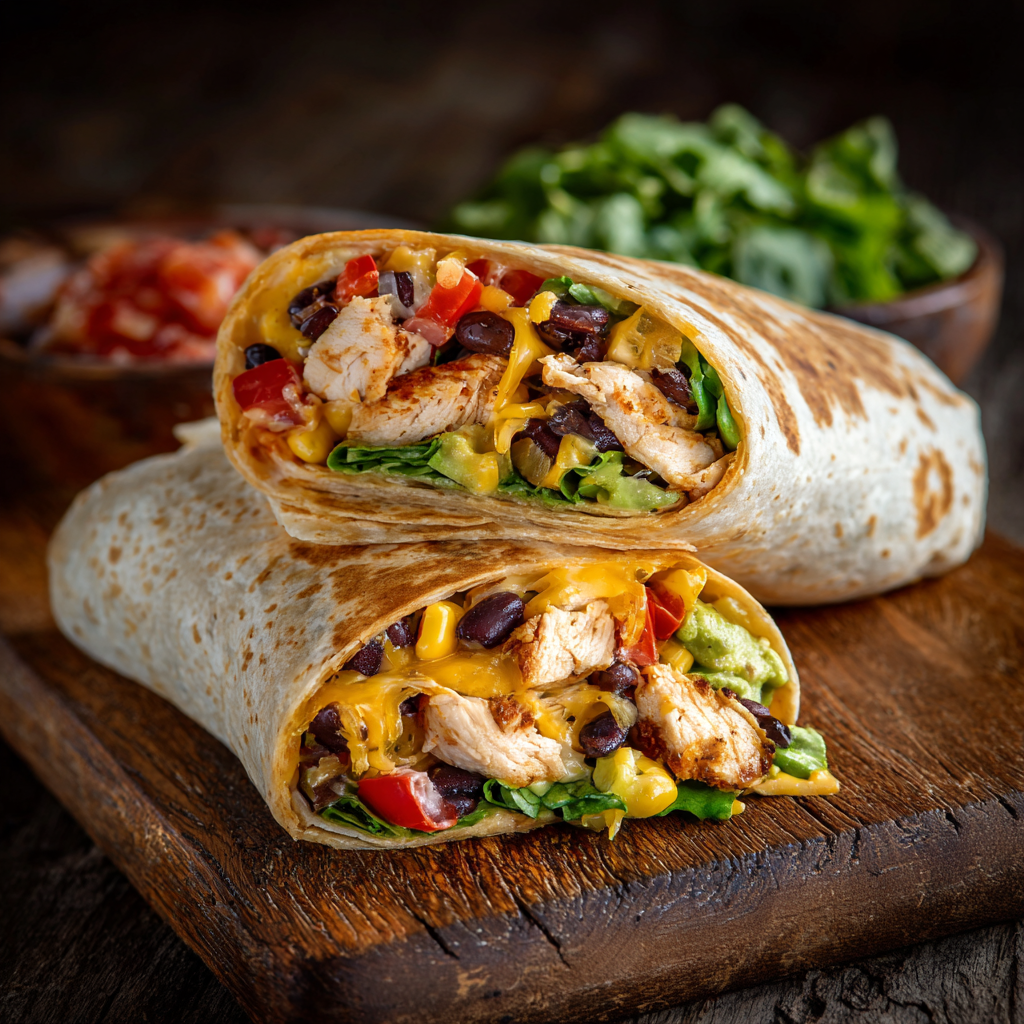
Southwest Chicken Wrap
A vibrant, smoky Southwest chicken wrap loaded with rice, beans, corn, and a creamy chipotle-lime sauce — perfect for lunch, meal prep, or an easy weeknight.

Classic Apple Crumble
A timeless apple crumble with a buttery, cinnamon-scented topping and tart-sweet Granny Smith filling — perfect warm with vanilla ice cream.
Did You Make This?
Leave a comment & rating below or tag @snapyrecipe on social media!
Rate This Recipe
Share This Recipe
Enjoyed this recipe? Share it with friends and family, and don't forget to leave a review!
Comments (1)
This recipe looks amazing! Can't wait to try it.
Comments are stored locally in your browser. Server comments are displayed alongside your local comments.
Hi, I'm Natalia!
What's Popular

Get My 30-Minute Meals email series!
Quick and easy dinner ideas delivered to your inbox.