>>
30-MINUTE MEALS! Get the email series now →


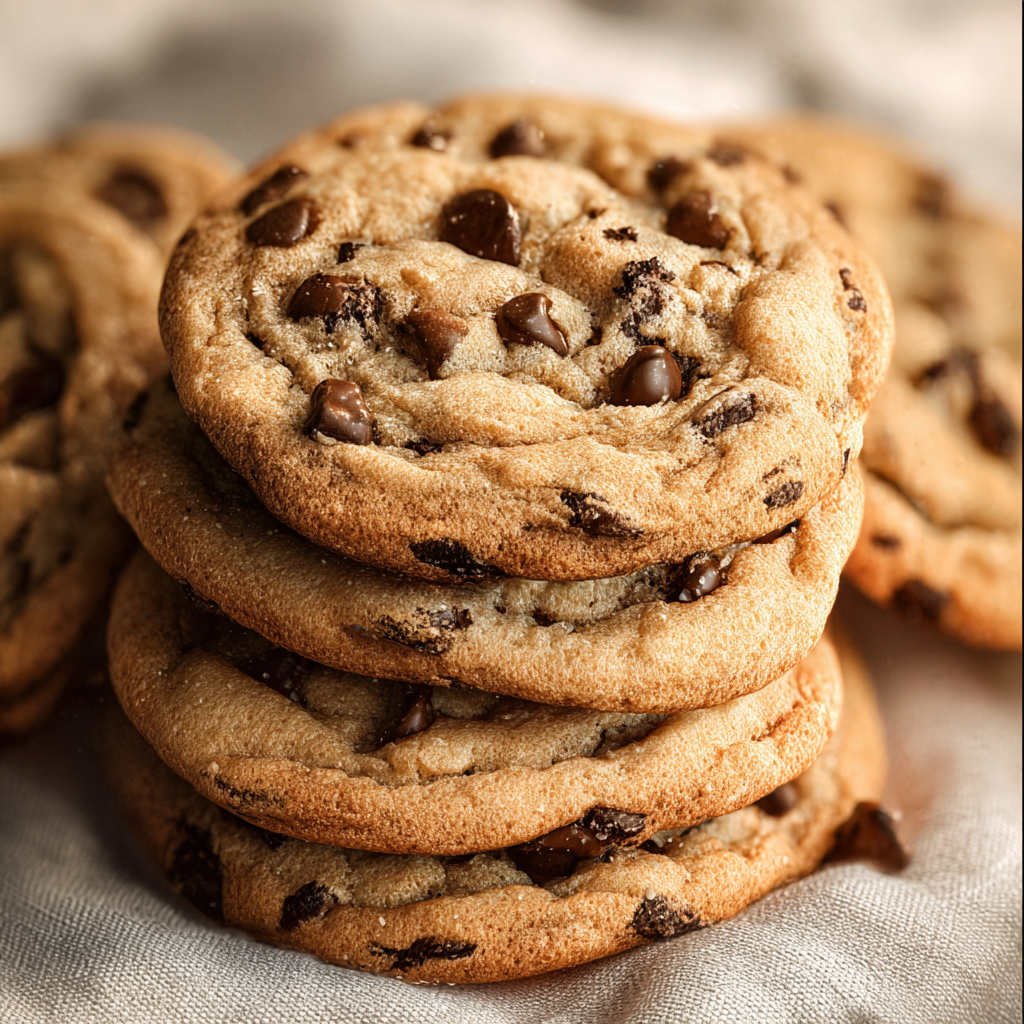
Thick, chewy bakery-style chocolate chip cookies with browned butter notes, crisp edges and gooey centers—perfect for sharing or keeping all to yourself.

From the first tray to the last, the family reaction is always the same: requests for more. I’ve watched friends tweak minor elements—different chocolates, sea salt sprinkles—and every version becomes a new favorite. Baking these always reminds me of weekend afternoons in my grandmother’s kitchen where sharing food meant slowing down and savoring the moment.
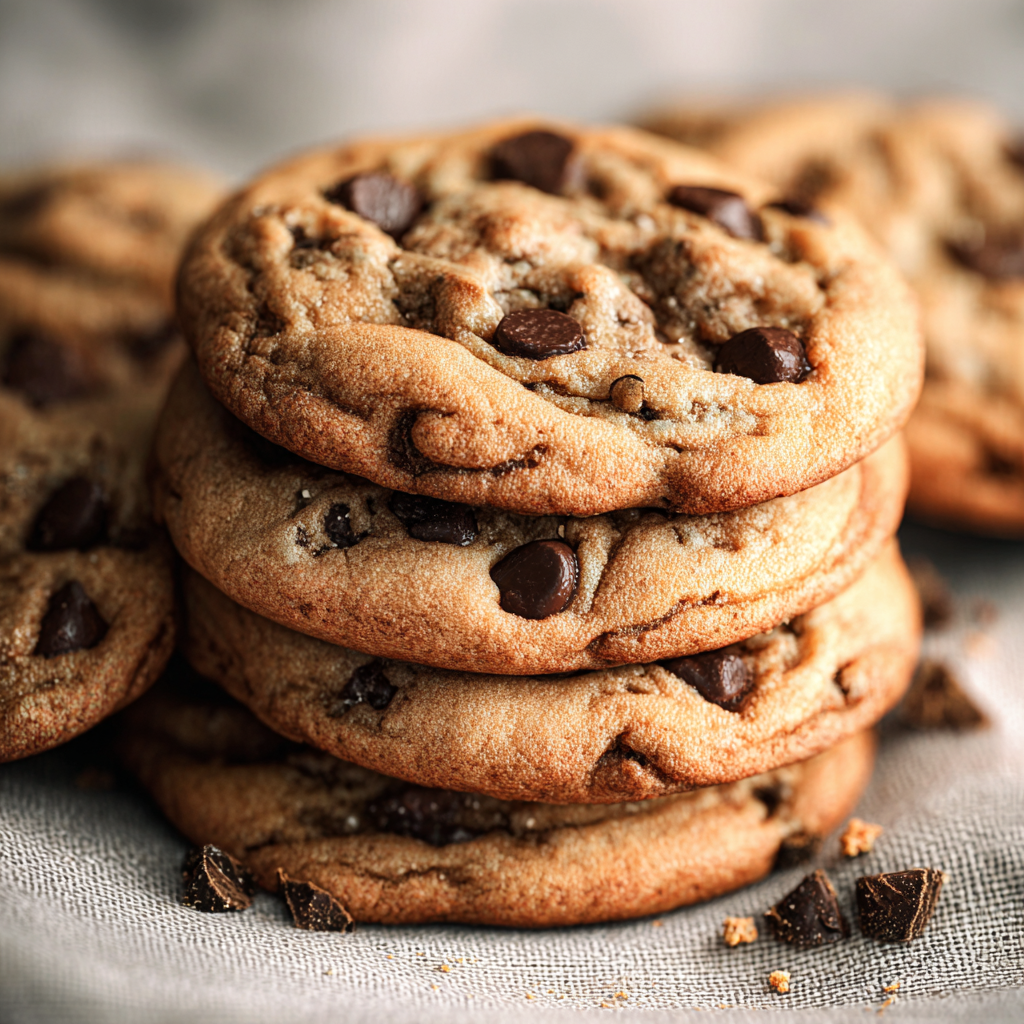
What I love most is how forgiving this method is. Even if the first tray is a touch overbaked, the next batch improved with one tweak—shortening the bake time by a minute. My kids and friends often debate which cookie from the sheet is the best (edge vs. center)—I always claim the center for myself.
To maintain texture and flavor, store cooled cookies in an airtight container at room temperature for up to 4 days. For longer storage, layer cookies between pieces of parchment in a freezer-safe container, then freeze for up to 3 months. When reheating from frozen, place cookies on a baking sheet at 300°F (150°C) for 5–7 minutes to refresh the exterior crispness while keeping the interior soft. If you want to prep dough ahead, portion and freeze scooped dough balls on a tray, then bag them; bake straight from frozen, adding a minute or two to the bake time for perfect results.
If you need to swap ingredients, use these guidelines: replace unsalted butter with salted butter but reduce added salt by 1/4 teaspoon. For a dairy-free option, substitute vegan butter sticks measured 1:1; texture may be slightly different. Swap light brown sugar for dark brown sugar for a more molasses-forward flavor. For a gluten-free version, use a 1:1 all-purpose gluten-free flour blend that contains xanthan gum. If you want cakier cookies, add one extra tablespoon of flour; for flatter, crisper cookies, reduce flour by one tablespoon and bake a touch longer.
Serve warm with a glass of cold milk, a scoop of vanilla ice cream for an impromptu cookie sandwich, or alongside coffee for an afternoon pick-me-up. For parties, arrange on a platter with a small bowl of extra chocolate chips and a sprinkle of flaky sea salt so guests can customize. They also pair nicely with salted caramel sauce or a dollop of mascarpone for a slightly elevated dessert plate.
The chocolate chip cookie is an American classic originating in the 1930s. What began as a small baking experiment evolved into a global favorite, with regional variations: thicker, chunckier New England-style cookies versus thinner, crisper extremes elsewhere. This version leans on bakery techniques—controlled chilling and consistent portioning—to echo the textures you find in specialty shops across the U.S.
Adjust the flavor profile seasonally: add a pinch of cinnamon and use milk chocolate chips for autumn; fold in dried cranberries and white chocolate for winter holidays; or add lemon zest and a handful of macadamia nuts for a bright spring variation. For summer gatherings, bake mini cookies and serve with chilled lemonade for a light snack plate.
For batch preparation, make dough and portion into 2-tablespoon balls, then freeze on a sheet until solid and transfer to labeled freezer bags. This makes last-minute baking effortless: preheat the oven and bake from frozen for just a couple extra minutes. If you're preparing for a week of snacks, bake one tray and freeze the rest fully baked; reheat individual cookies briefly in the microwave or toaster oven for a near-fresh experience.
These cookies bridge the gap between everyday comfort and bakery indulgence. They’re flexible, dependable and always bring people together—so bake a batch, share them, and make a few memories around the kitchen table.
Chill dough for at least 30 minutes to control spread and deepen flavor; 24 hours yields an even chewier texture.
Use a 2-tablespoon scoop for uniform cookies and even baking across trays.
Pull cookies when edges are golden but centers are still slightly soft; carryover heat will finish them.
Line baking sheets with parchment for easy release and consistent browning.
Rotate pans halfway through baking if your oven has hot spots to ensure even color.
This nourishing bakery style chocolate chip cookies recipe is sure to be a staple in your kitchen. Enjoy every moist, high protein slice — it is perfect for breakfast or as a wholesome snack any time.
Yes — scoop dough balls and freeze on a tray, then transfer to a freezer bag for up to 3 months. Bake from frozen, adding 1–2 minutes.
Store in an airtight container at room temperature for up to 4 days. Refrigerate for up to 1 week and freeze for up to 3 months.
This Bakery Style Chocolate Chip Cookies recipe makes perfectly juicy, tender, and flavorful steak every time! Serve with potatoes and a side salad for an unforgettable dinner in under 30 minutes.
Cream softened butter with granulated and light brown sugar on medium speed for 2–3 minutes until pale and fluffy. Scrape sides of the bowl once for even mixing.
Beat in eggs one at a time, mixing well after each addition, then stir in vanilla until evenly combined.
Whisk flour, baking soda and salt in a separate bowl to aerate and remove lumps before adding to the wet mixture.
Add dry ingredients gradually on low speed and mix until just combined. Fold in chocolate chips with a spatula until distributed evenly.
Cover and refrigerate for at least 30 minutes or up to 24 hours; chilling slows spread and develops flavor.
Preheat oven to 375°F (190°C). Portion dough with a 2-tablespoon scoop onto parchment-lined sheets, spacing 2 inches apart. Bake 9–12 minutes until edges are golden and centers remain slightly soft.
Let cookies cool on the baking sheet for 5 minutes to set, then transfer to a wire rack to cool completely.
Last Step: Please leave a rating and comment letting us know how you liked this recipe! This helps our business to thrive and continue providing free, high-quality recipes for you.
Leave a comment & rating below or tag
@snapyrecipe on social media!
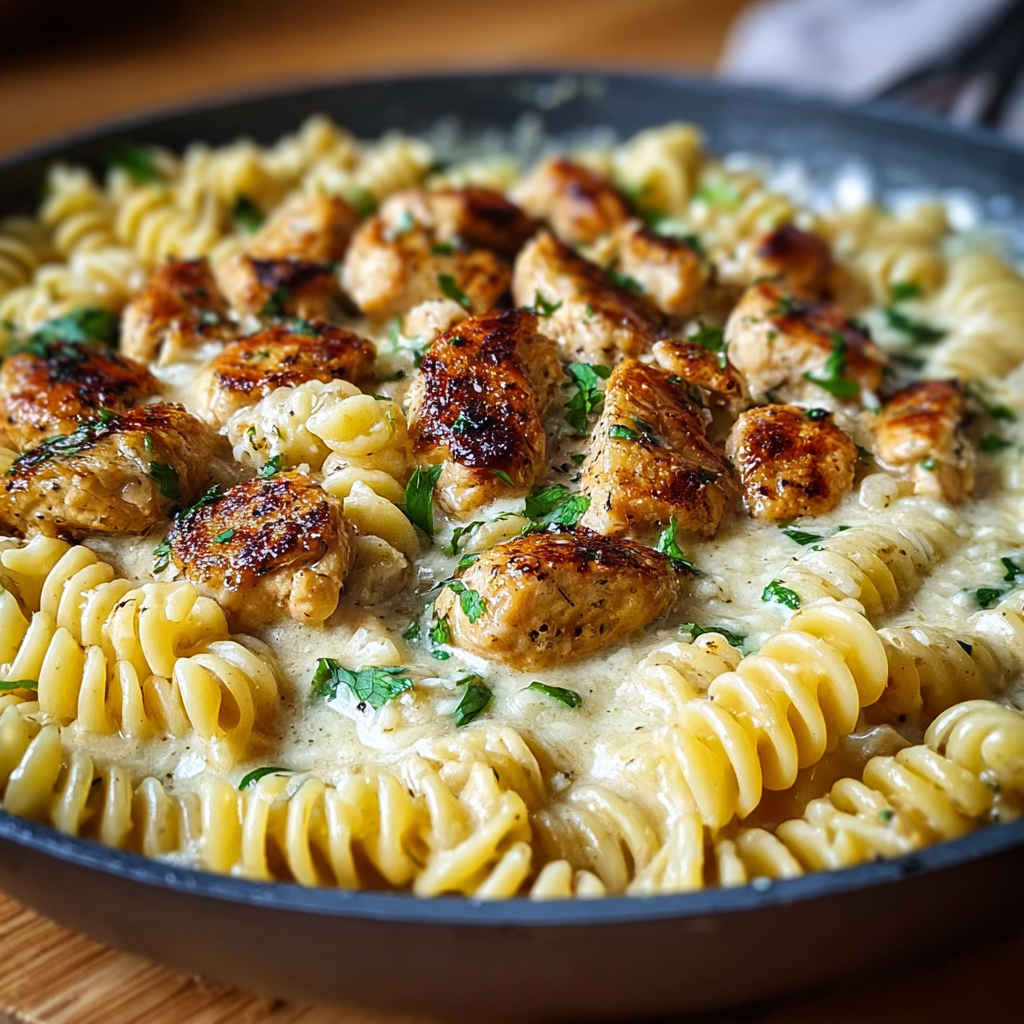
Golden-browned chicken tossed with rotini in a silky garlic Parmesan sauce—comforting, quick, and perfect for weeknight dinners.
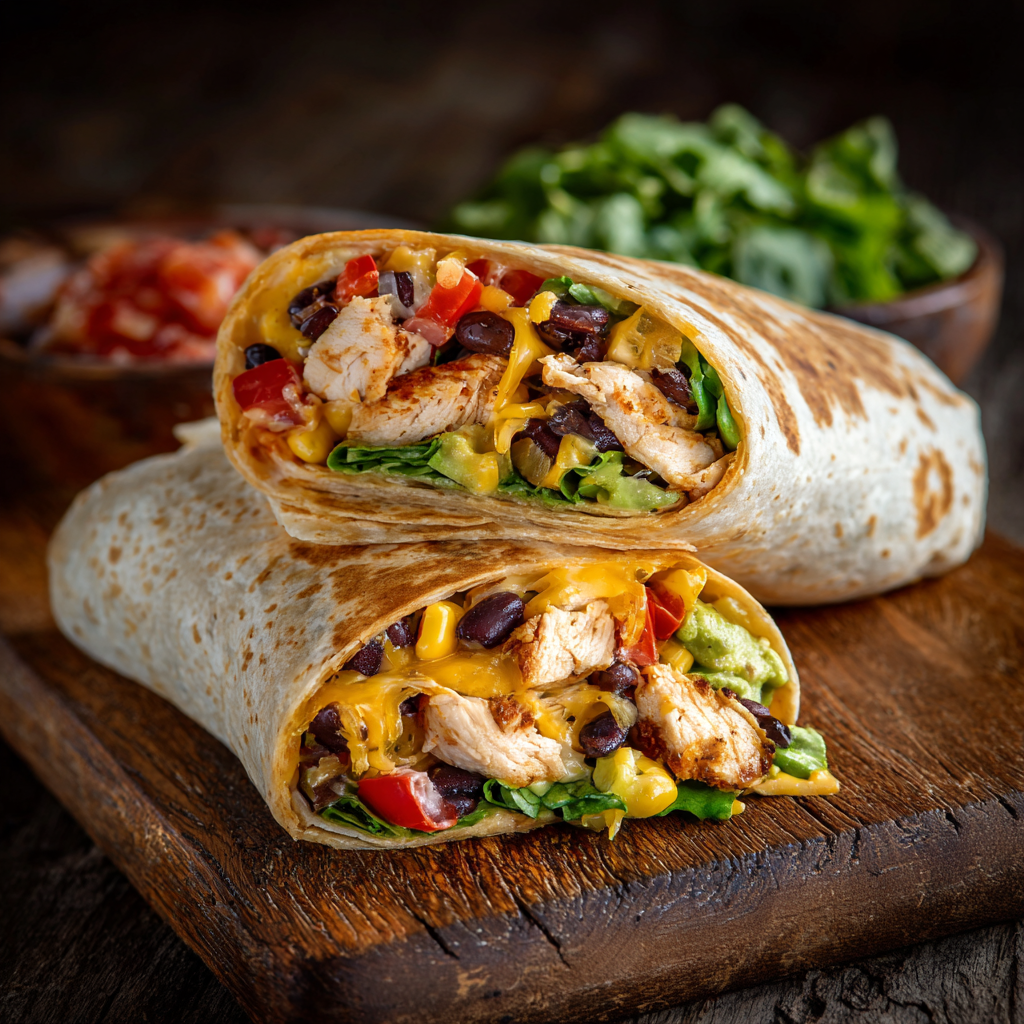
A vibrant, smoky Southwest chicken wrap loaded with rice, beans, corn, and a creamy chipotle-lime sauce — perfect for lunch, meal prep, or an easy weeknight.

A timeless apple crumble with a buttery, cinnamon-scented topping and tart-sweet Granny Smith filling — perfect warm with vanilla ice cream.
Leave a comment & rating below or tag @snapyrecipe on social media!
Enjoyed this recipe? Share it with friends and family, and don't forget to leave a review!
This recipe looks amazing! Can't wait to try it.
Comments are stored locally in your browser. Server comments are displayed alongside your local comments.
Quick and easy dinner ideas delivered to your inbox.